Spotlight - Ansible Semaphore
Ansible is a simple, yet proven way to automate your server configuration, cloud deployments and many other things. Yet, most people know Ansible on the command line, which is perfectly fine for CI/CD or if you like to work with text.


Ansible is a simple, yet proven way to automate your server configuration, cloud deployments and many other things. Yet, most people know Ansible on the command line, which is perfectly fine for CI/CD or if you like to work with text.
There are many benefits to have a graphical representation of your playbooks, inventories, and tasks. Let's take a look at Ansible Semaphore.
Ansible
Ansible is the Open Source automation software for small use cases or entire cloud ecosystems. With just a bit of YAML, you can start to automate your package installations, network configuration or Kubernetes on AWS.
In the past, I wrote a couple of articles about Ansible and also took a look at the ecosystem occasionally. In case you never heard of Ansible, you should start with one of my "Getting Started" articles.
 Daniel Schier
Ansible Semaphore
Now, what is Ansible Semaphore? In a very simple way: A web UI for Ansible. But, there is already AWX, which seems to be the default web interface for Ansible. Why should you bother about Semaphore?
First, it is way easier to get the gist of Ansible Semaphore. Furthermore, it is easier to install and configure for smaller environments, yet provides tons of features. In the below sections, we will set it up and start with implementing our very first use case.
Scenario
Our scenario is super simple. We will need a repository, providing our Ansible code (which was developed on our workstation beforehand), a server that we want to control (managed node) and a machine running Ansible Semaphore (control node). Furthermore, we want to use containers (of course) and therefore run Ansible Semaphore in Podman.
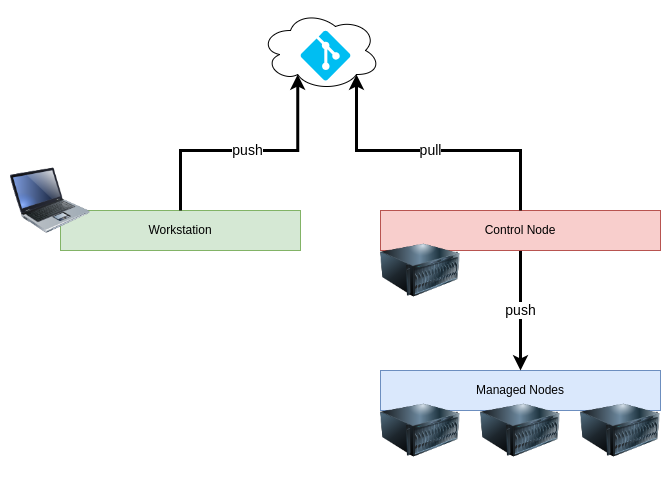
The resulting architecture picture will look like the above. Ready? Let's set it up.
Installation
I am using Podman for the setup. Semaphore requires having two containers running. One is the database, the other one is semaphore itself. Since both need to communicate with each other, we also want to have them in a dedicated container network. All of this can be done with four simple commands.
# Create a new Podman network
$ podman network create semaphore
The above will create the new network, where DNS will be enabled and containers can communicate via their names with each other.
# Create PostgreSQL container
$ podman run -dt \
  --name postgres \
  --net semaphore \
  -v semaphore-postgres:/var/lib/posgresql/data \
  -e POSTGRES_USER=semaphore \
  -e POSTGRES_PASSWORD=semaphore \
  -e POSTGRES_DB=semaphore \
  docker.io/library/postgres:14
The above will create a PostgreSQL container, which will be used to store our configuration and settings.
# Create an Access Key for semaphore
$ head -c32 /dev/urandom | base64

# Create Semaphore container
$ podman run -dt \
  --net semaphore \
  -p 3000:3000 \
  --name semaphore \
  -e SEMAPHORE_DB_USER=semaphore \
  -e SEMAPHORE_DB_PASS=semaphore \
  -e SEMAPHORE_DB_HOST=postgres \
  -e SEMAPHORE_DB_PORT=5432 \
  -e SEMAPHORE_DB_DIALECT=postgres \
  -e SEMPAHORE_DB=semaphore \
  -e SEMAPHORE_PLAYBOOK_PATH=/tmp/semaphore \
  -e SEMAPHORE_ADMIN_PASSWORD=secure \
  -e SEMAPHORE_ADMIN_NAME=admin \
  -e SEMAPHORE_ADMIN_EMAIL="admin@localhost" \
  -e SEMAPHORE_ADMIN=admin \
  -e SEMAPHORE_ACCESS_KEY_ENCRYPTION="YourAccessKey" \
  -e SEMAPHORE_LDAP_ACTIVATED=no \
  -e ANSIBLE_HOST_KEY_CHECKING=False \
  docker.io/semaphoreui/semaphore:latest
Be aware, that I added the ANSIBLE_HOST_KEY_CHECKING=False line, which disables ssh host key checking for all Ansible tasks in Ansible Semaphore. This should be avoided in production.
Lastly, we started the Semaphore container. After a brief moment, the service will be available via http://IP_ADDRESS:3000.
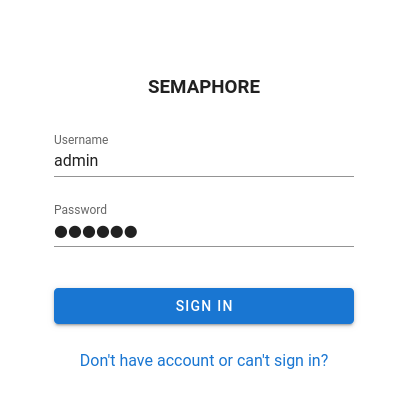
You can log in with your admin credentials provided above (admin:secure in the example).
By the way, in case you aren't comfortable with the volumes and networks in the above commands, I recommend taking a look at the below articles.
Daniel Schier Daniel Schier
You can also find more details about optional variables, configuration and more in the official documentation. In case you want to use another database or passwords, please check out the docs.
First Steps
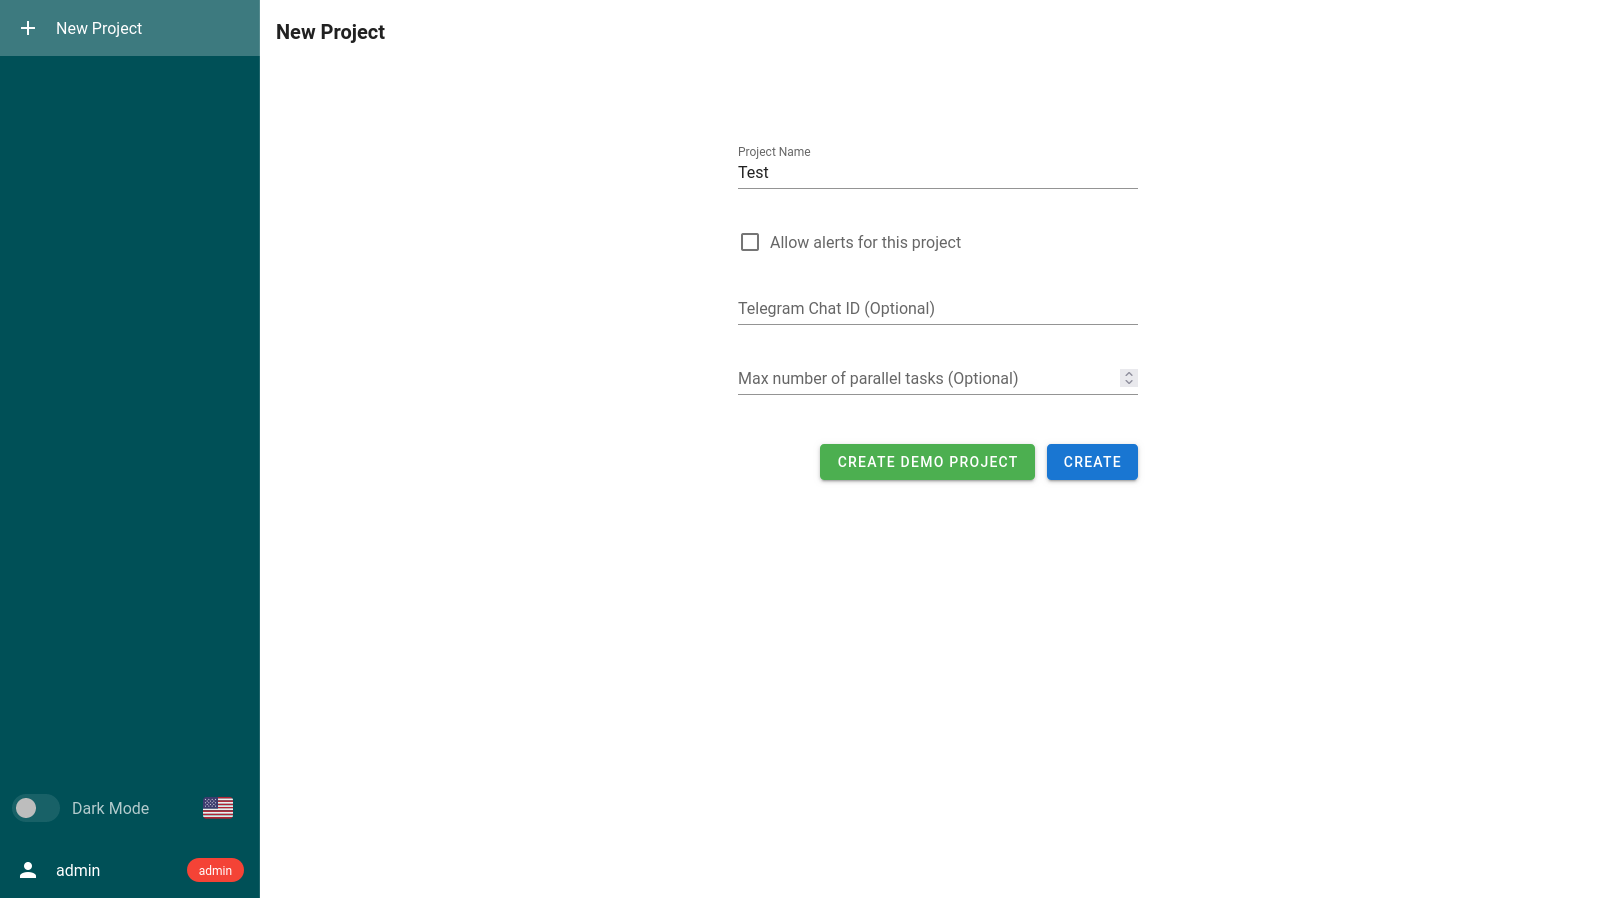
After the initial login, you will be greeted by a project creation dialog. This is the first step you need to make.
Project
A project is a construct that keeps all your inventories, repositories, environments etc. together. You can name it however you like.
Well, that's already the start of your journey. To replicate our scenario from above, some things are missing – an inventory, connecting our repository and a task template. Let's do these. Afterward, you will be on your own and discover more about Semaphore.
Inventory
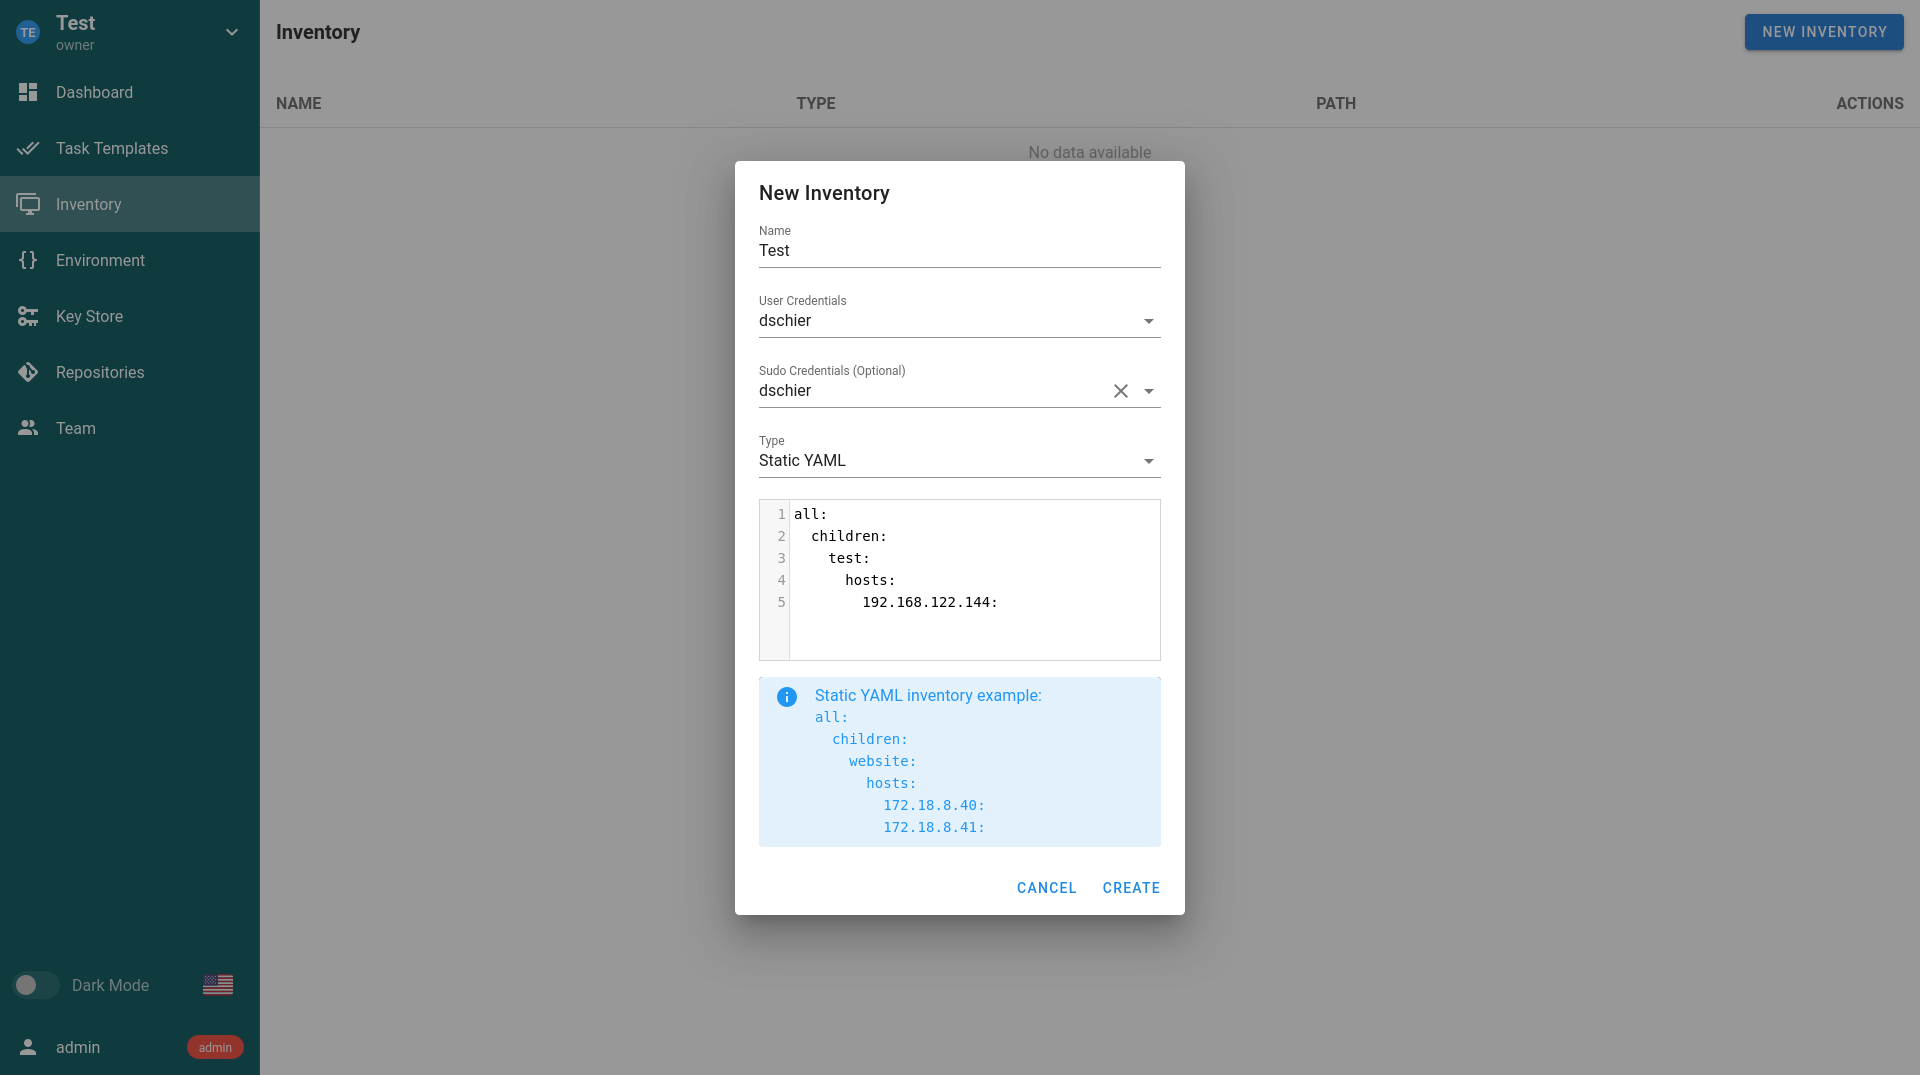
Let's create the inventory. I have a single AlmaLinux 9 machine in my environment, that I want to manage. To make it available in Semaphore, we have to create/configure some user credentials and create the inventory. Create a new Key in the Key Store for your managed node (aka target machine).
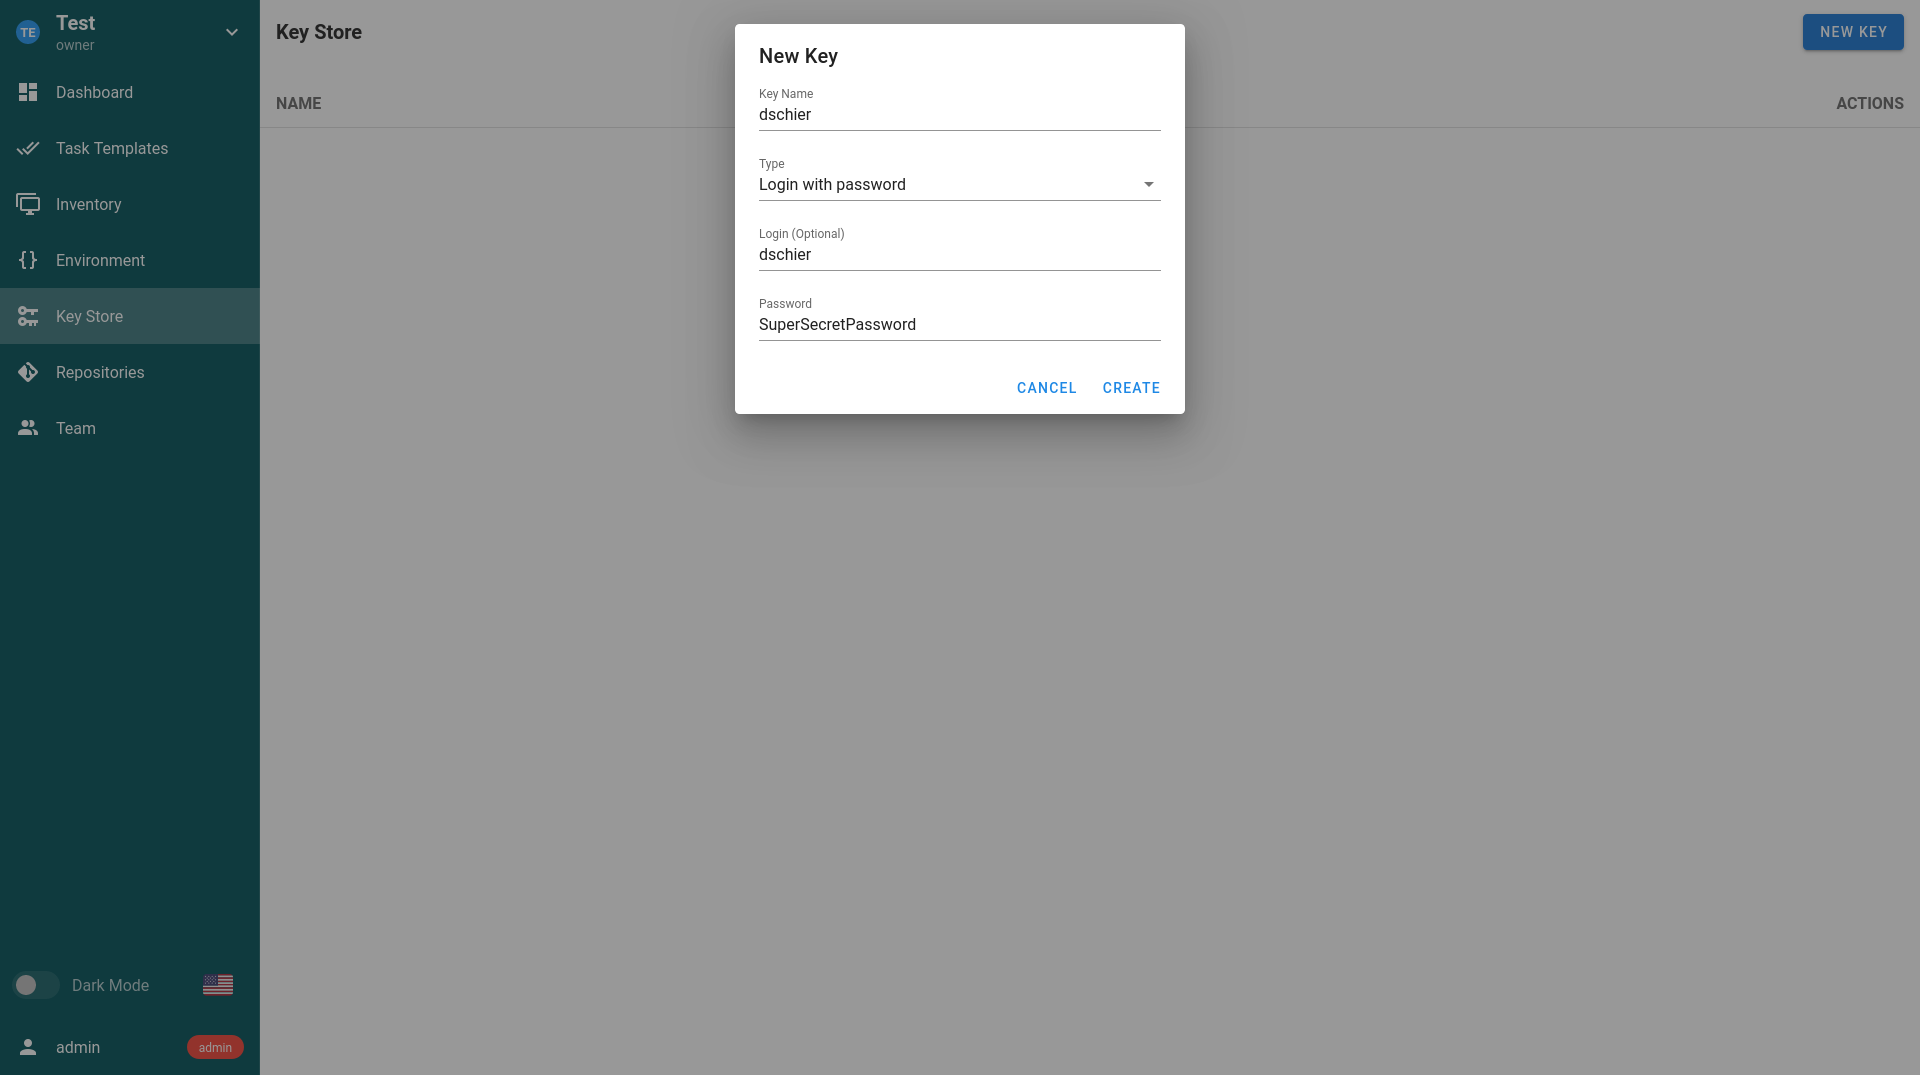
Afterward, you need to jump to the Inventory tab and create a new inventory. For the credentials, you need to choose a key from the Key Store.
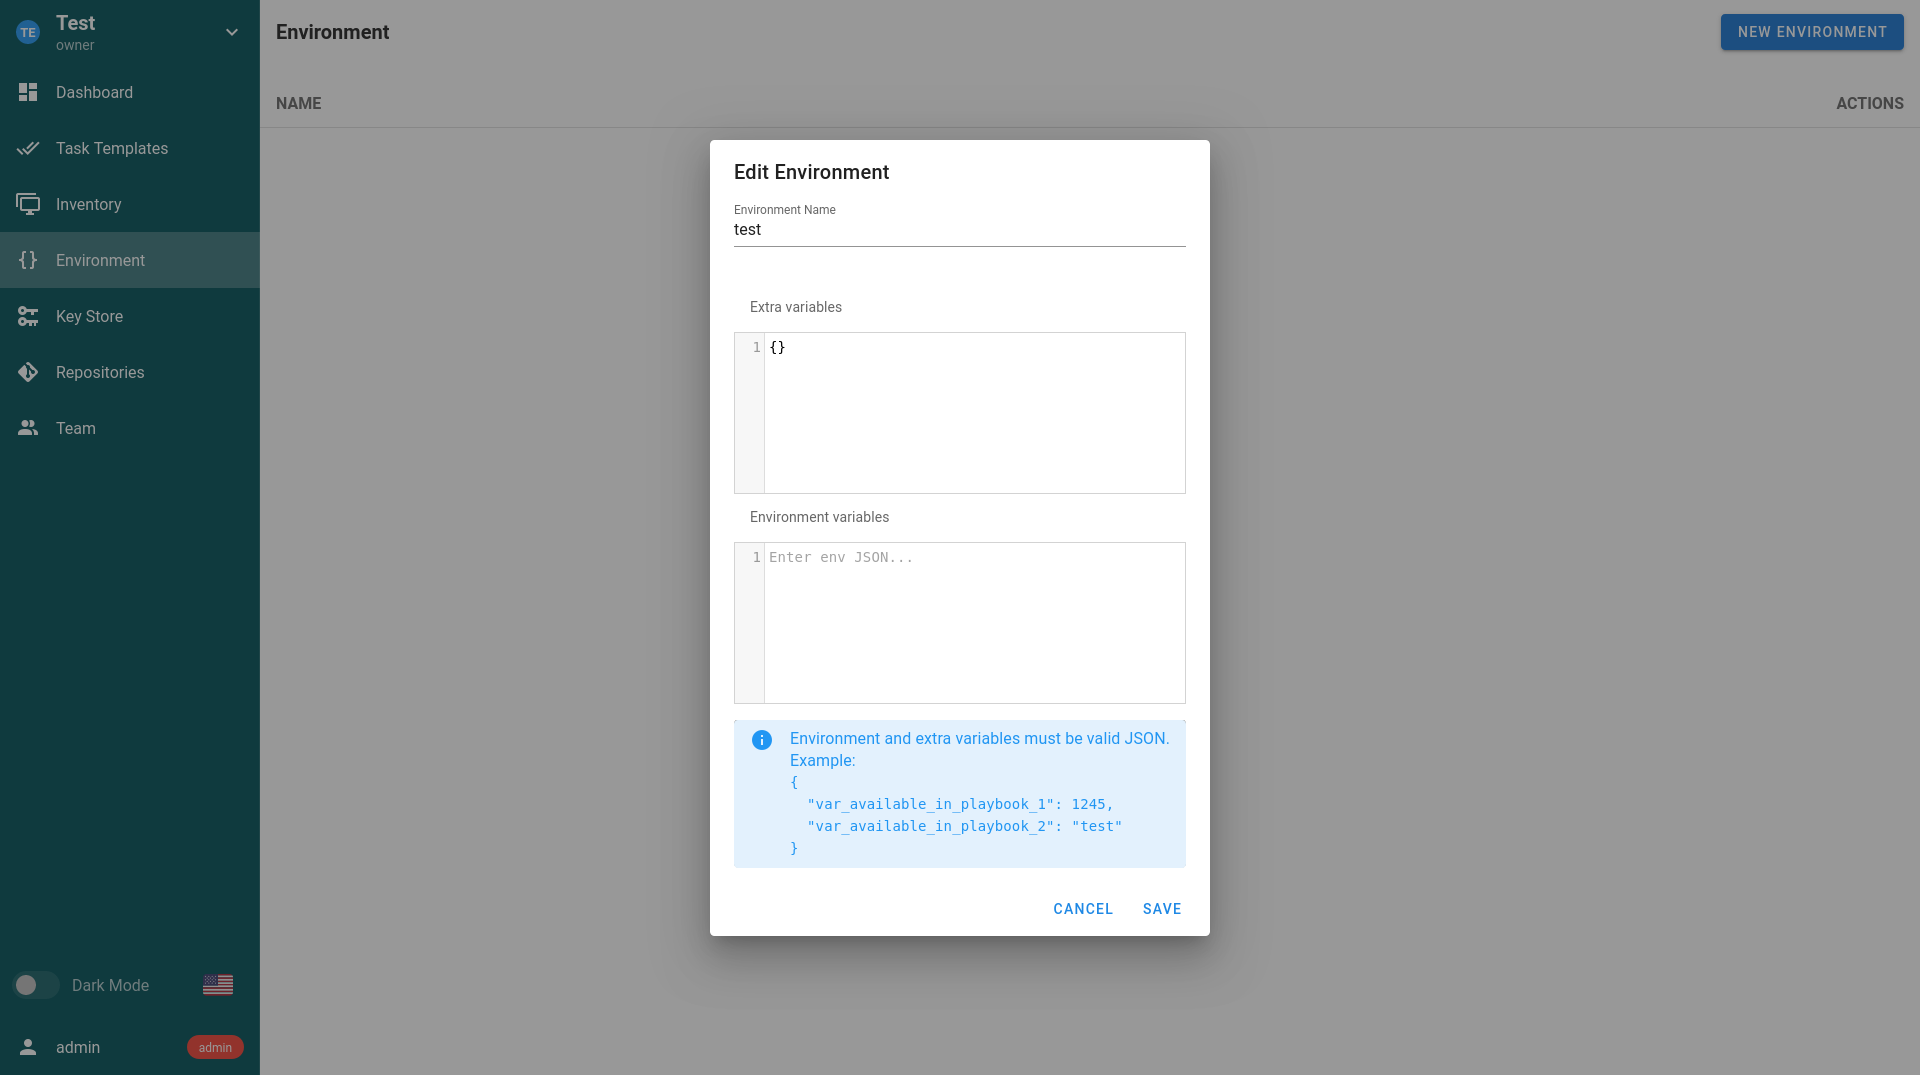
Environment
We will also need an Environment. Such an environment can be used to provide additional context, like special variables. For the first steps, we can create an empty environment.
Repository
A repository in Ansible Semaphore contains all the playbooks, that can be executed. My repository contains just a single playbook, looking like the below.
- name: "Test playbook for semaphore"
  hosts: "test"

  tasks:

    - name: "Output the OS"
      ansible.building.debug:
        var: "ansible_distribution"
The code is available on GitHub. To add it to Ansible Semaphore, we need to hop back to the Key Store, first. Create a dummy key of the type None.
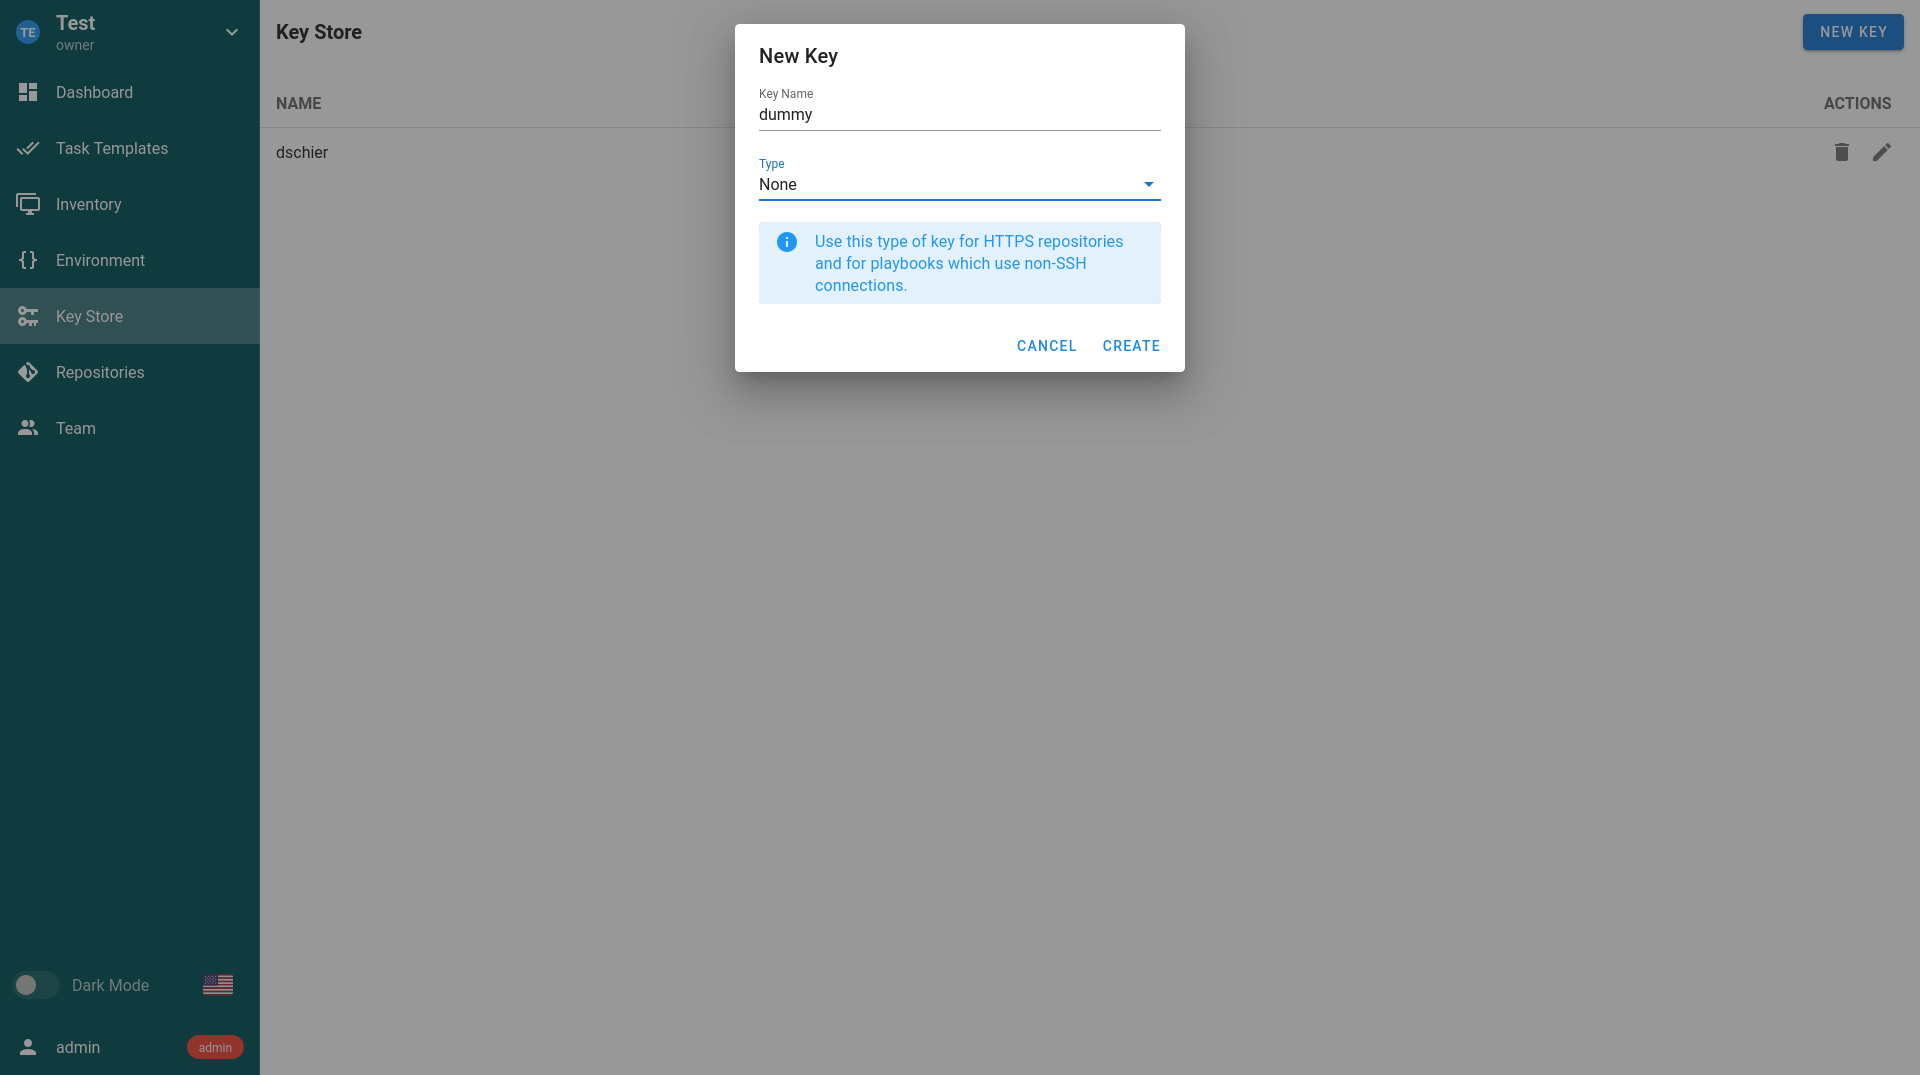
Next, you need to go to the Repositories tab and add the repository. For the access key, use the dummy key.
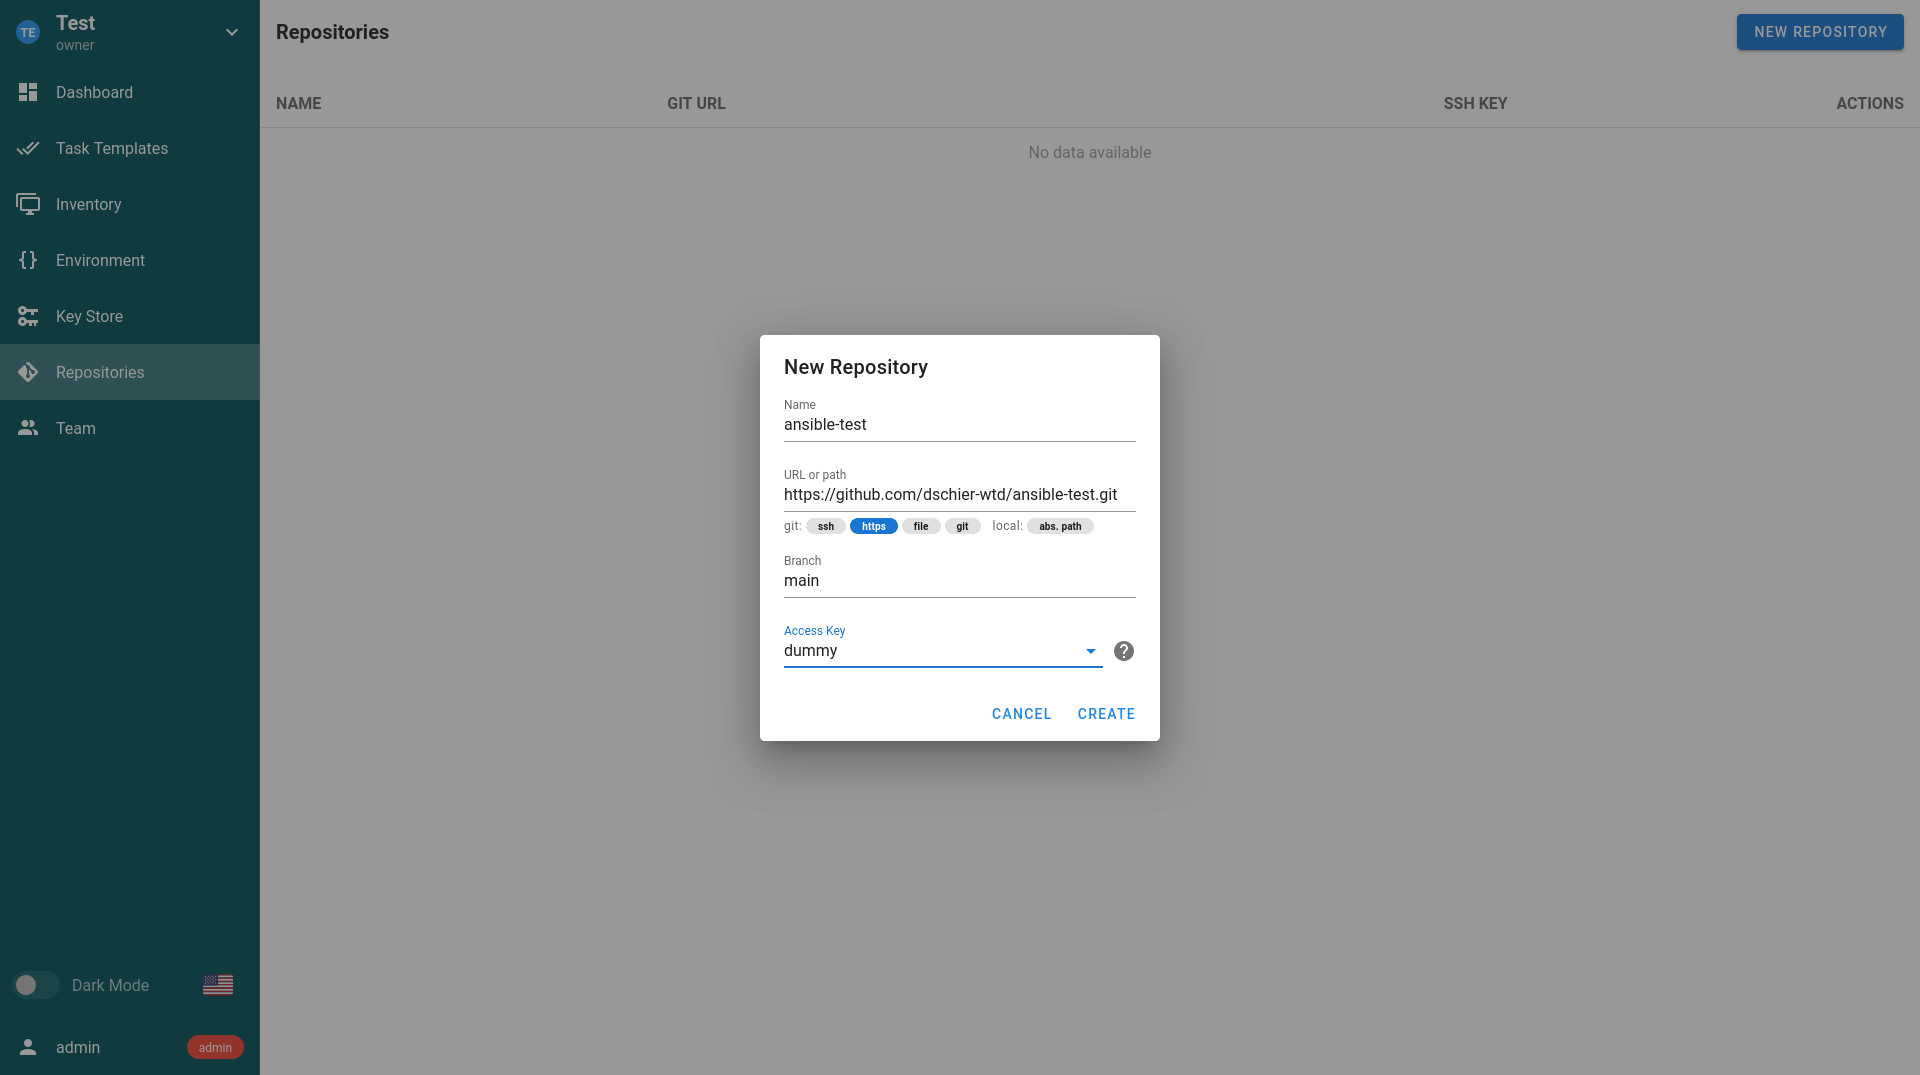
Now, the repository is added. Only one more step.
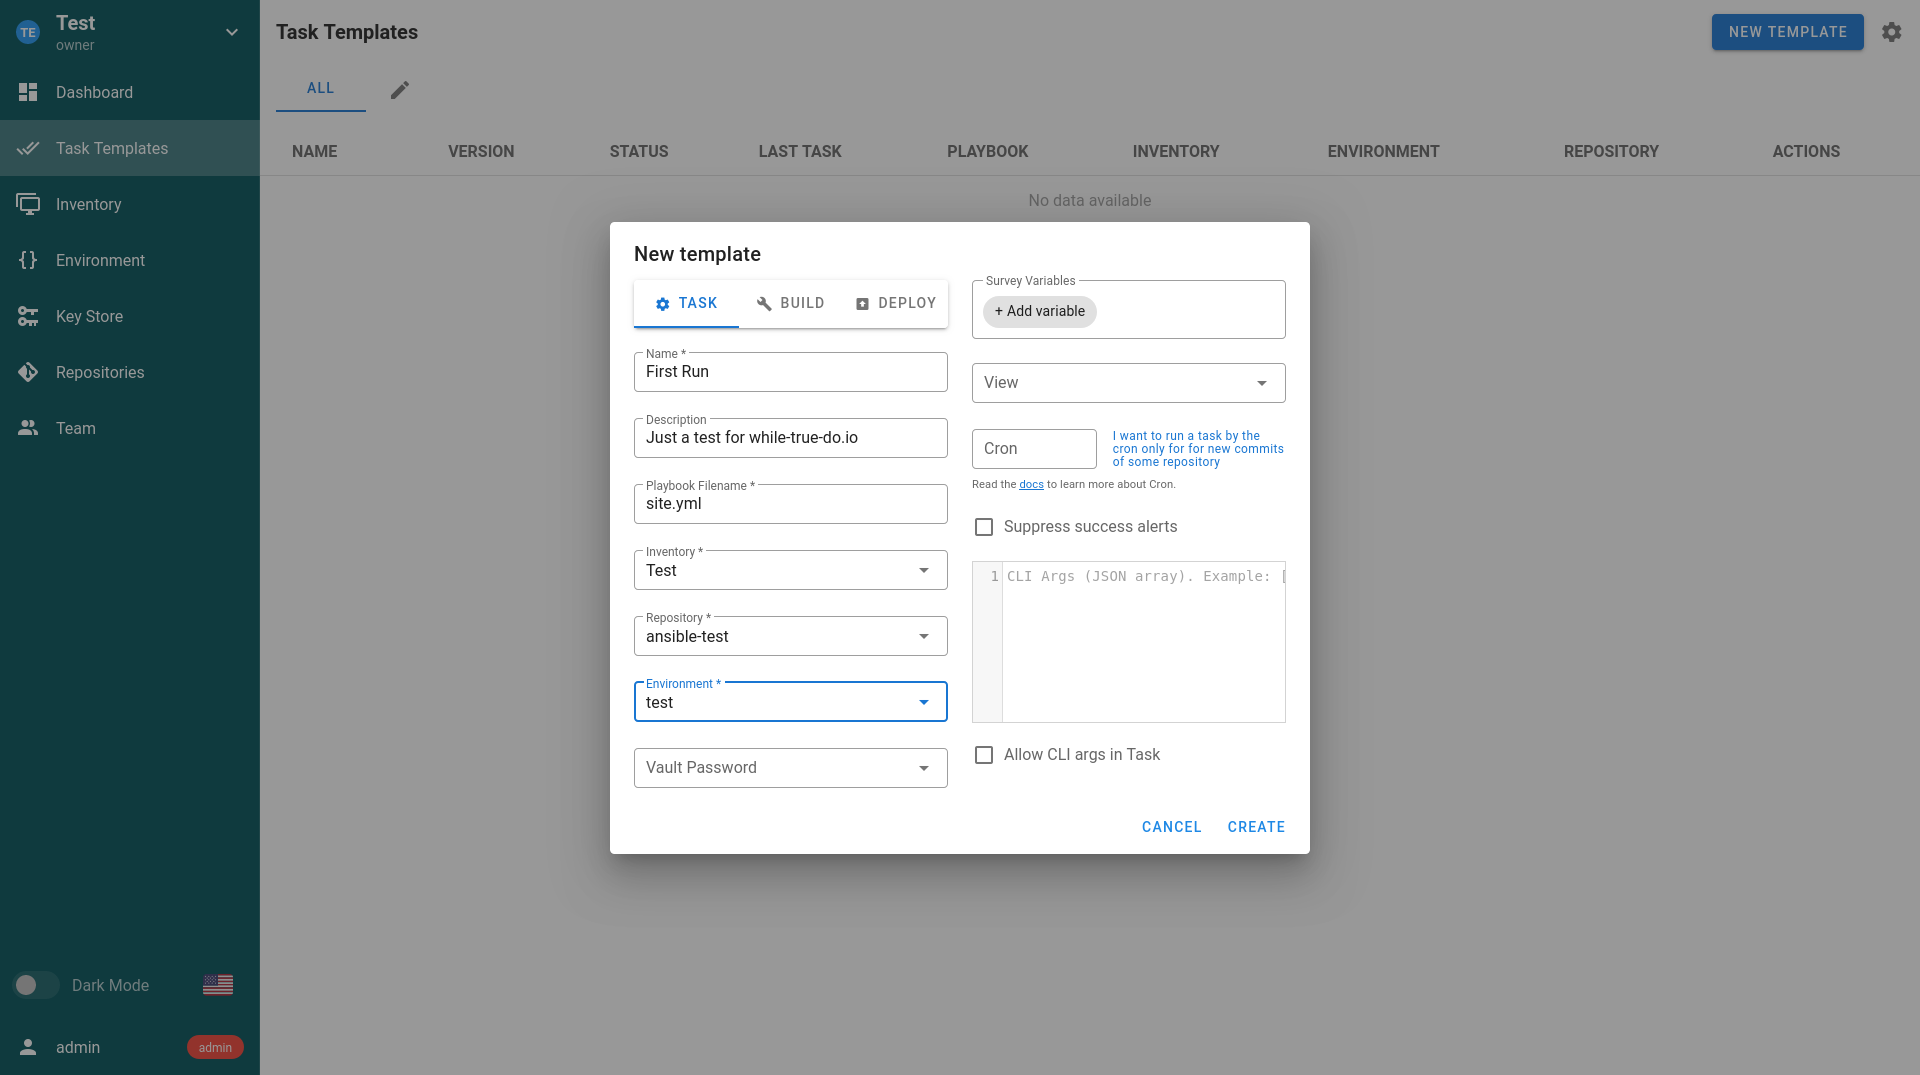
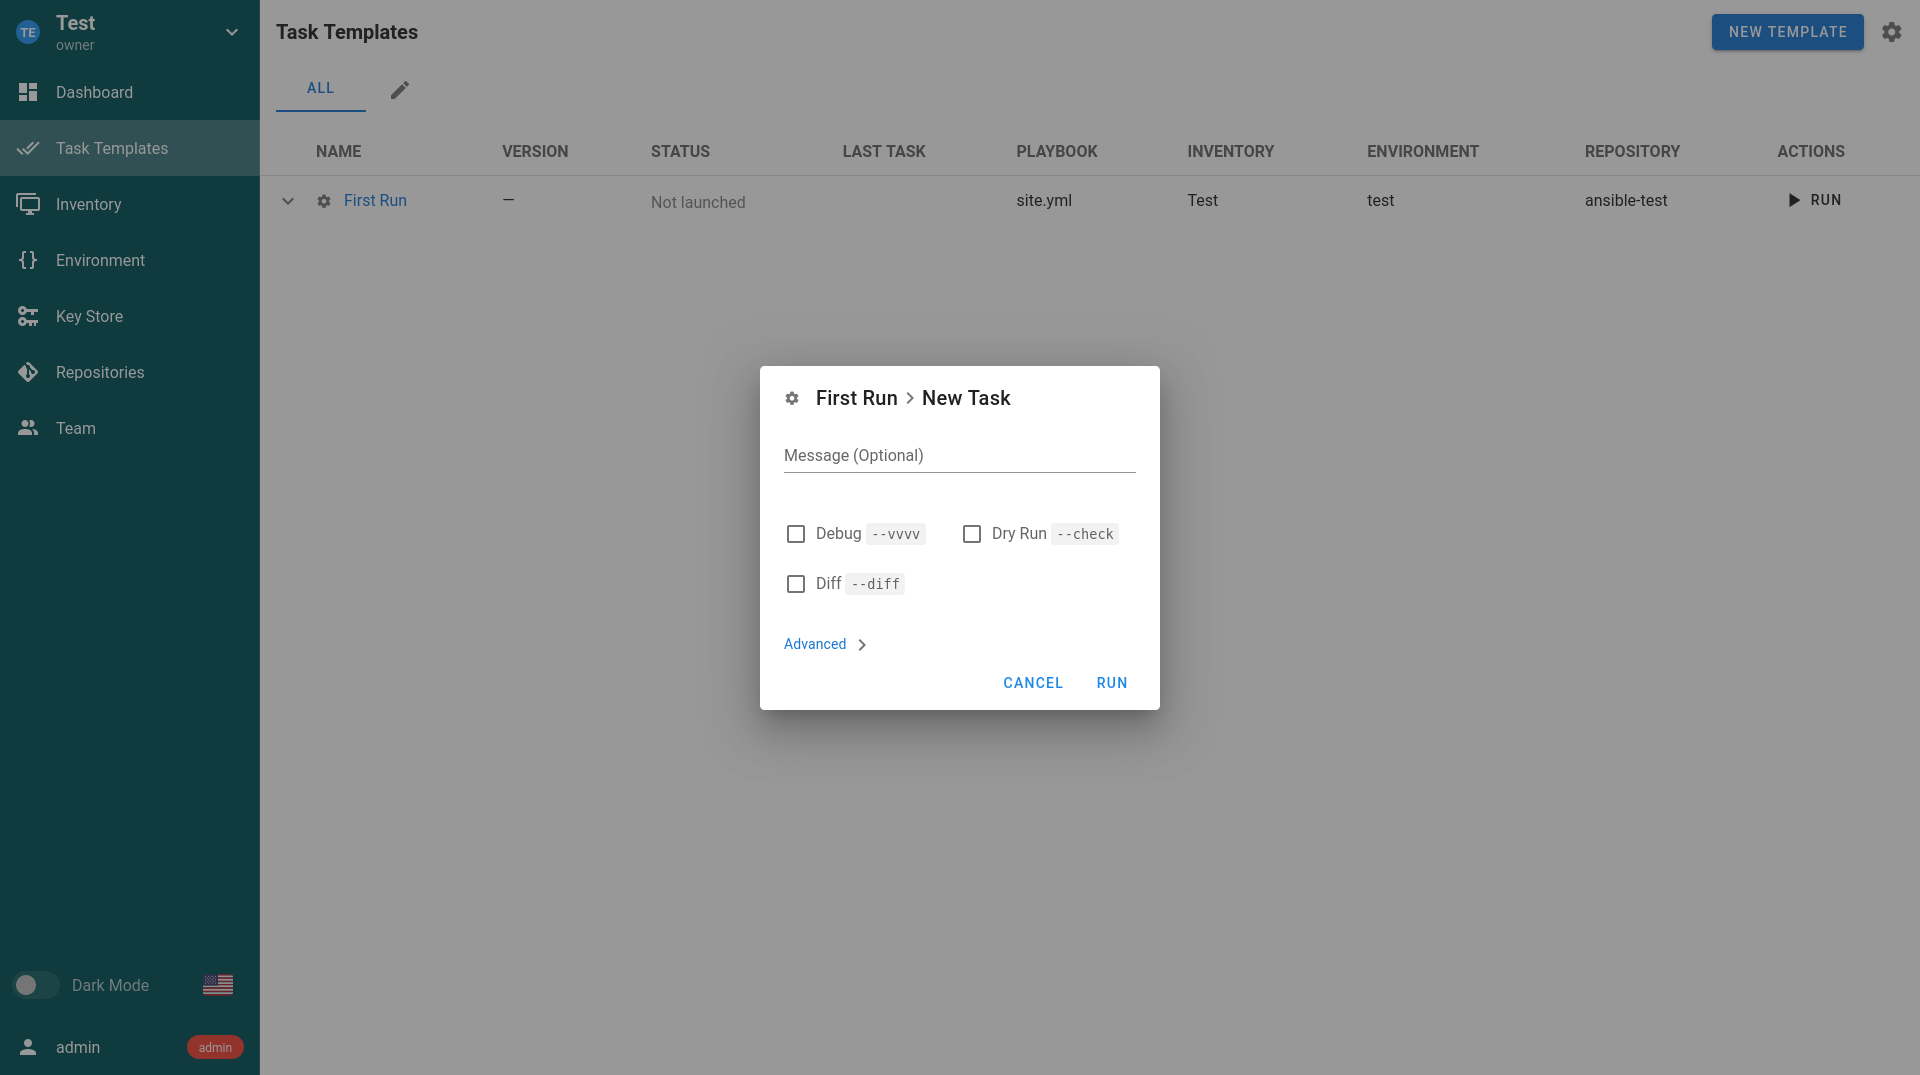
Task Templates
Finally, we can create our task template and execute the task a first time. Ansible Semaphore provides simple Tasks, Build jobs and Deploy jobs. For a first test, a simple task is good enough.
Go to the Task Templates tab and add the new task template like shown below.
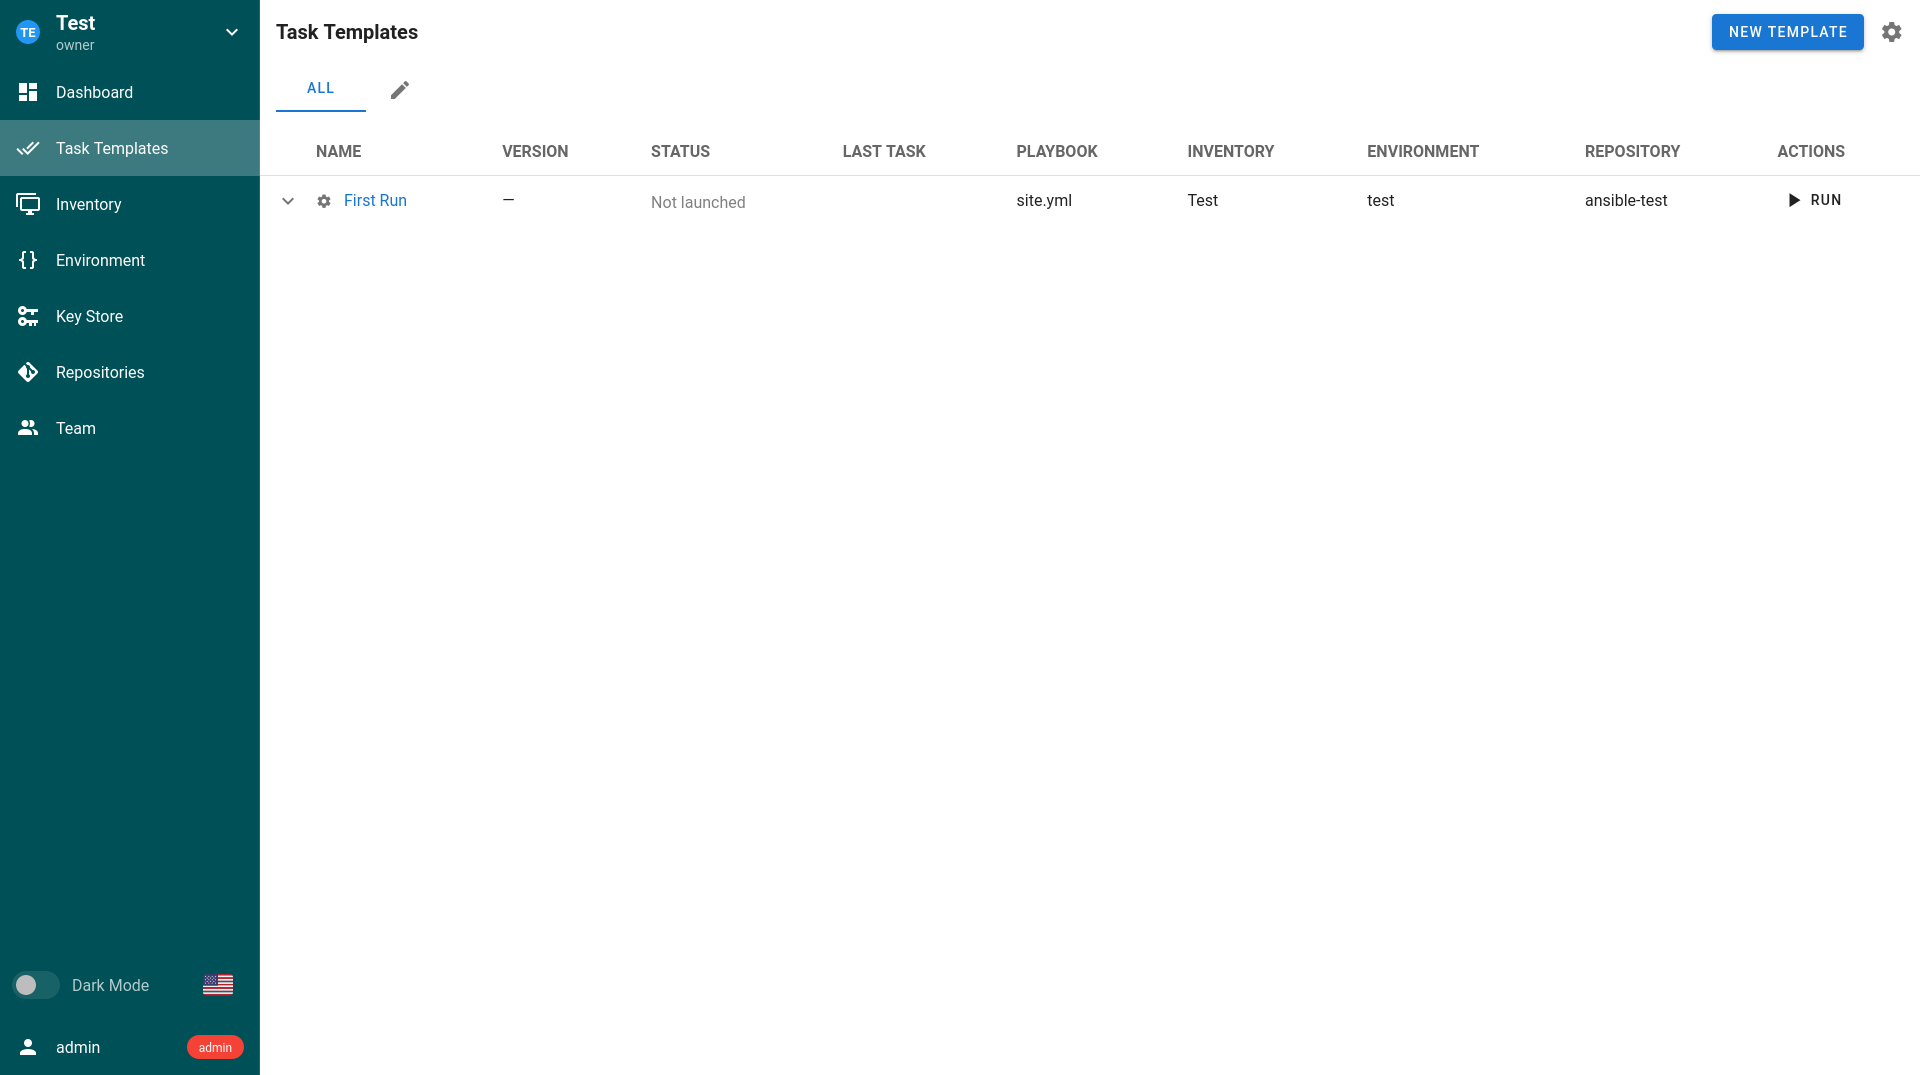
Yay, finally we can execute the first run. You only need to cross fingers and hit the little Run button.
After doing so, you will be granted with a last prompt for ad-hoc changes and the terminal output for your run.
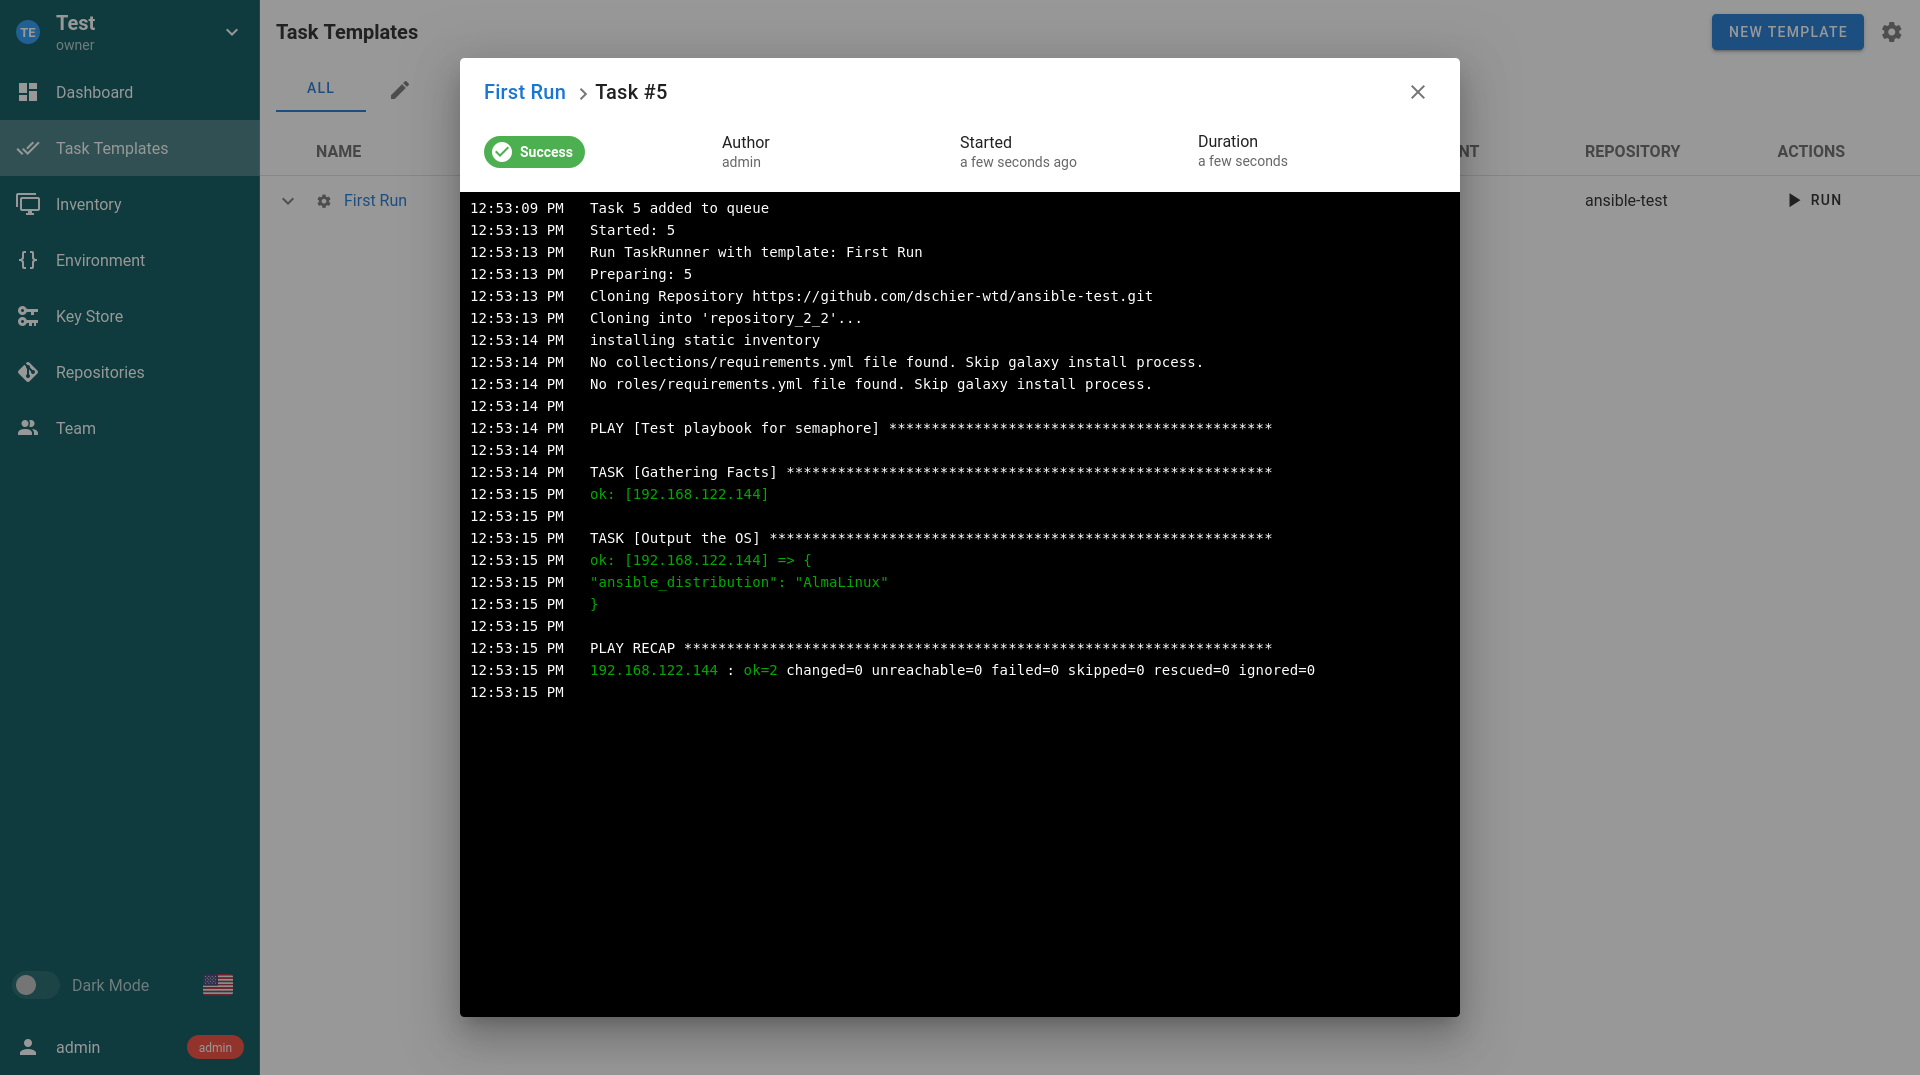
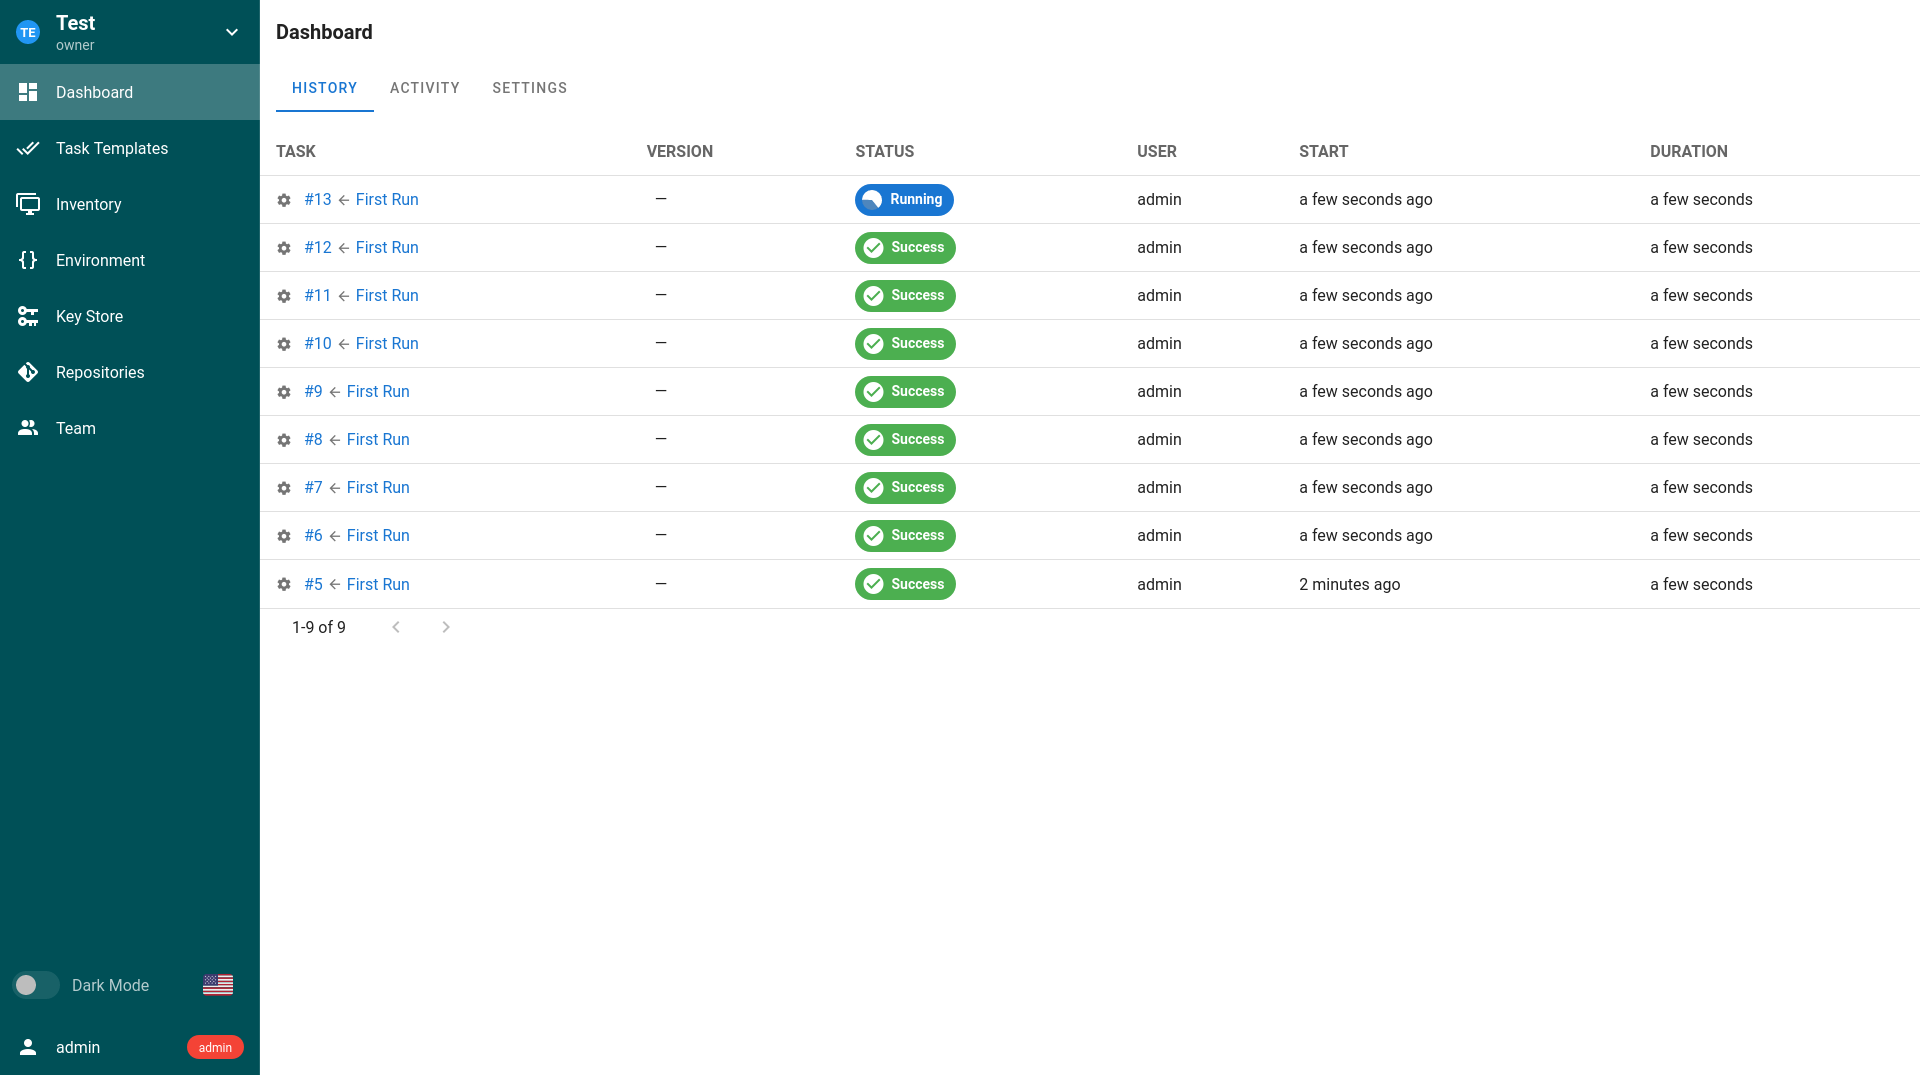
Whoop, this worked well. You can also review your runs in Dashboard.
And that should be it for the first steps. You can find lots of more details in the official documentation.
Alternatives
The most prominent alternative is AWX, the upstream project for the Red Hat Automation Platform. It is a powerful suite of tools to automate your landscapes at scale and provides way more features. But, it is also a bit heavier on the resources, more complex to set up and maintain.
 ansible
Another, pretty popular alternative might be Rundeck. The community edition is Open Source and can be integrated with Ansible. Rundeck provides much more than just Ansible, which makes it pretty complex.
Docs & Links
Below, you can find some more content and articles regarding Ansible Semaphore and useful articles about Ansible.
Author


Conclusion
Now, is it worth to take a look at Semaphore? For me, it is. It provides a simple, yet powerful web UI for Ansible. With some user management, you can grant access to tasks. You can manage multiple projects, environments and multiple repositories. The web interface works well on mobile devices and desktop browsers alike.
Give it a try and let me know how it works for you. Or, are you even using it already? What is your experience?