KVM - Getting Started
In some past articles, we tackled KVM and libvirt as a virtualization option on Linux. But I never introduced the basics for the same. Therefore, let's have a look at KVM and libvirt on Fedora and see how you can get started.


In some past articles, we tackled KVM and libvirt as a virtualization option on Linux. But I never introduced the basics for the same. Therefore, let's have a look at KVM and libvirt on Fedora and see how you can get started.
KVM/libvirt
KVM (Kernel-based Virtual Machine) is an open source virtualization technology built into the Linux Kernel. You can turn Linux into a hypervisor with KVM. This allows a host machine to run multiple, isolated virtual machines.
Libvirt on the other hand is a toolkit with an API, that allows you to communicate with different virtualization backends. You can use it programmatically, but there are also ready-to-use client tools. Libvirt can be used for KVM, QEMU, LXC and many more.
Both tools in combination allow you to build a virtualization host and even large clusters. Virtual Machines can be provided with different features, network configuration, storage options and much more.
Prerequisites
Before going into the installation part, you need to ensure that your machine supports virtualization. Sometimes, this must be enabled in the BIOS/UEFI beforehand. You can test, if your machine has enabled virtualization in your Linux environment.
# Check
$ egrep '^flags.*(vmx|svm)' /proc/cpuinfo
The above command should provide you with some output, where either "vmx" or "svm" can be found. If so, everything is fine. If not, please check your BIOS/UEFI to enable virtualization.
Installation
Installing KVM and libvirt on Fedora, CentOS or AlmaLinux is done with just some simple commands. Both tools are already available and fully supported. After the package installation, we just need to enable the libvirt services, but it is recommended to do a reboot to apply pending groups, permissions and kernel/system parameters.
# Install Packages
$ sudo dnf install libvirt-daemon-config-network libvirt-daemon-kvm qemu-kvm virt-install

# Enable Services
$ sudo systemctl enable --now libvirtd.service

# Optional Reboot
$ sudo reboot

# Verify that kvm is loaded (Intel)
$ lsmod | grep kvm
kvm_intel             368640  0
kvm                  1073152  1 kvm_intel
irqbypass              16384  1 kvm

# Verify that kvm is loaded (AMD)
$ lsmod | grep kvm
kvm_amd               114688  0
kvm                   831488  1 kvm_amd
With the above commands, we also installed some config packages that will take care of creating a default network, so we can start immediately. We also installed "virt-install", which will be handy to create new machines easily.
Usage
After installing the above, you may want to know: "How can I create VMs?" I hope you can be patient for just a bit longer. We need to tackle something beforehand.
Rootless and Root VMs
In Red Hat family operating systems (Fedora, AlmaLinux, RockyLinux, CentOS), the default installation will enable user VMs AND root VMs. This allows to create virtual machines as a user, but also as root. This way, every user that is able to log in can create his own machines, restart them and destroy them. But, he is not able to interfere with the machines from another user.
This adds some cool value for security reasons (no root needed for VMs), but also management options (yay, personal VMs).
This can be checked with the below commands:
# User context
$ virsh uri
qemu:///session

# Root context
$ sudo virsh uri
qemu:///system
As you can see, both are using a different path to interact with the machines. The session context is for the user only.
Creating machines
Now that this is out of the way, let's create some machines. I have chosen to provision an AlmaLinux machine as user/in the user session.
First, we need to download the AlmaLinux ISO. Since the name is somewhat bulky, I want to rename it during the download, too.
# Download the ISO
$ wget -O AlmaLinux-8.6.iso https://repo.almalinux.org/almalinux/8/isos/x86_64/AlmaLinux-8.6-x86_64-boot.iso
Afterwards, we can start an installation, using the virt-install command.
# Start user installation
$ virt-install \
    --name AlmaUser \
    --memory=2048 \
    --vcpus=2 \
    --disk size=10 \
    --graphics=none \
    --network=default \
    --extra-args console=ttyS0 \
    --console pty,target_type=serial \
    --location=AlmaLinux-8.6.iso
This seems like a lot of options and arguments, but it is pretty easy. We are just providing a name, the amount of vcpu cores, some memory in MB, create a disk with 10 GB and are using the default network. As the source location, we are using the AlmaLinux-8.6.iso, which we downloaded a minute ago.
The console parameters are more or less optional. But, I want to stay on the terminal. The default installation of the ISO assumes that we want to use a graphical installation. To avoid this and to map a console from our host to the virtual machine, we need to provide both console parameters.
After running the command, we will be on said console, immediately. Don't be scared, this is normal (for now). Just follow the text based installer and create a minimal machine.
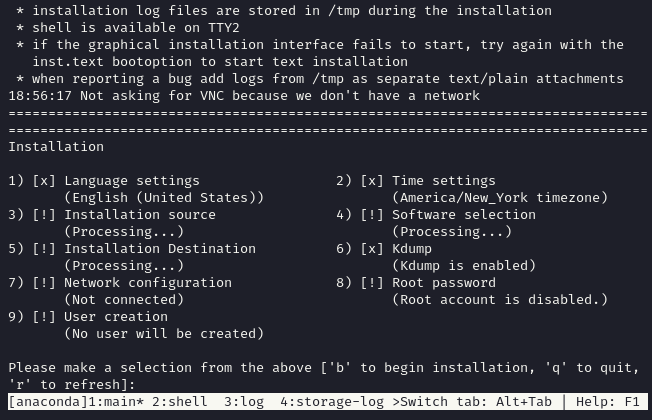
After fiddling around with the installer, you can finally continue.
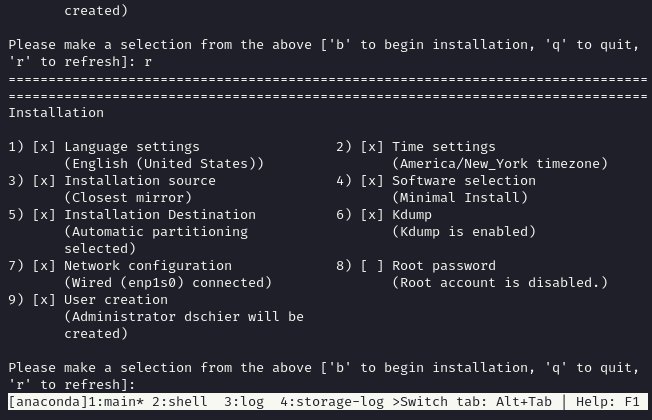
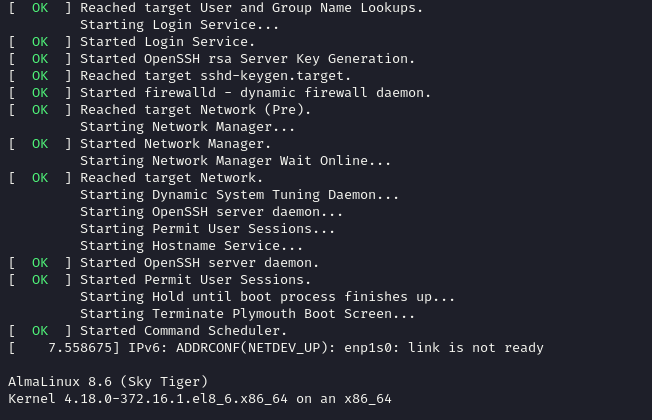
Now that the installation runs, you just need to wait, that the machine is done. This can some minutes, so grab a cup of coffee or tea and lean back. The machine will reboot at the end and you will be presented with a login prompt.
For now, let's leave the console. It's long enough that we stayed here. Just hit Ctrl+] and you will be dropped to your regular terminal.
Gathering information
The first thing you might be interested is some information about your machines.
As already stated, root machines and user machines are different, which can be seen by listing VMs.
# List user/session machines
$ virsh list
 Id   Name       State
--------------------------
 3    AlmaUser   running

# List root/system machines
$ sudo virsh list
[sudo] password for dschier:
 Id   Name   State
--------------------
This will list the running machines, only. But you can also list all VMs.
# List all machines
$ virsh list --all
You can also get some more detailed information.
# get domain info
$ virsh dominfo AlmaUser
Id:             3
Name:           AlmaUser
UUID:           c9163ea3-9b59-421f-8f88-50eb3351770a
OS Type:        hvm
State:          running
CPU(s):         2
CPU time:       66,6s
Max memory:     2097152 KiB
Used memory:    2097152 KiB
Persistent:     yes
Autostart:      disable
Managed save:   no
Security model: selinux
Security DOI:   0
Security label: unconfined_u:unconfined_r:svirt_t:s0:c213,c652 (enforcing)
Or, get information about the disks.
# Get FS info
virsh domfsinfo AlmaUser
 Mountpoint   Name   Type   Target
------------------------------------
 /            dm-0   xfs    vda
 /boot        vda1   xfs    vda
There are lots of options. You can get an overview for all commands by checking the help.
# Get help
$ virsh help

# Get help for a command
$ virsh COMMAND --help
Interacting with machines
Let's interact with the VM. For example, you want to stop, restart or start a virtual machine.
# Stop a VM
$ virsh destroy AlmaUser
Domain 'AlmaUser' destroyed

# Start a VM
$ virsh start AlmaUser
Domain 'AlmaUser' started

# Restart a VM
$ virsh reboot AlmaUser
Domain 'AlmaUser' is being rebooted
Most VMs also support suspend and wake up.
#Suspend a machine
$ virsh suspend AlmaUser
Domain 'AlmaUser' suspended

# Wake up
$ virsh resume AlmaUser
Domain 'AlmaUser' resumed
That should do it for now.
Back to the console
In the beginning, we were using the console to connect to our machine. This was basically part of the installation process. If you want to connect to the console again, just enter the below command
# Connect to the console
$ virsh console AlmaUser
If you are satisfied with your work in the machine, you can leave the console at any time by hitting Ctrl+].
Removing machines
If you don't need the VM any longer and want to get rid of it, you need to stop it and undefine the machine.
# Stop the machine
$ virsh destroy AlmaUser
Domain 'AlmaUser' destroyed

# Undefine the machine
$ virsh undefine AlmaUser
Domain 'AlmaUser' has been undefined
Additionally, you should take care of the disk images, which were created. For users, you will find them in /home/USER/.local/share/libvirt/images/. For root/system VMs, you can find the images in /var/lib/libvirt/images/.
Next Steps
Now that the very basic things are out of the way, you can dig deeper. Sure, learning more about virt-install and virsh should be mandatory. But what else?
Cockpit integration
You are not a console friend, but you want to create machines easily? I have already tackled Cockpit in some articles. It offers a web interface to interact with virtual machines in a simple way and also take care of the lifecycle.
# Install cockpit
$ sudo dnf install cockpit cockpit-machines

# Start the service
$ sudo systemctl enable --now cockpit.socket
I find Cockpit so useful, it is also part of my home server.
Kickstart/Cloud Init
If you want to avoid the manual installation, there are some very useful options, too. You can either use Kickstart, which I already tackled in the "Kickstart - Getting Started" article or (even better) look into cloud images and cloud-init, which was addressed in the "Cloud-Init Getting Started" article.
Docs & Links
I have found a couple of interesting and useful blog articles, guides and documentation for further reading, too.
 admin
admin
Conclusion
I think, this article was very much needed, since we talked about virtual machines a lot, but never got the basics out of the way. If you are interested in an even deeper look and learn more about KVM or libvirt, but also other options (LXC maybe? Xen?), please feel free to get in touch with. I am looking forward to your use cases and feedback.