Fedora - Home Server (Management)
Concept done, Hardware done, started with automation and now? Sure, we want to make the new home server manageable. I want to see errors, updates, performance data at a glance and configure some minor things ad-hoc. This article is exactly about this addition to our home server.


Concept done, Hardware done, started with automation and now? Sure, we want to make the new home server manageable. I want to see errors, updates, performance data at a glance and configure some minor things ad-hoc. This article is exactly about this addition to our home server.
Intro
This series is explaining how we are setting up a home server from scratch. There are already three articles published and more will come. The below list will be updated accordingly, so you can easily find the article for your demand.
- Intro & Concept
- Hardware & OS
- Automation
- Management
- Virtualization
- Container
- Time, DHCP, DNS Server
- Git Server
- File, Calendar, Contact Sync
- Application Dashboard
As you can see, we will take care of the "Management" part, today.
Management
Automating a server is nice, but if you are having a home lab / home server, you most likely need to do things ad-hoc or just check how everything is working. Therefore, let's set up some management software and automate the installation of the same.
We want to have a couple of features:
- See the system status
- Interact with the terminal
- Check and Install Updates
- Check for Errors and Services
- Check the performance data
All of this (and more) can be done with Cockpit. It provides a web ui, that allows you to manage your machine. It is very lightweight, too. The huge benefit of Cockpit is, that it does not overwrite your configurations, but uses APIs to change things on your system. If you change network settings, Cockpit will do nmcli connection API commands in the background. I have written a detailed article about Cockpit previously, if you want to know more about it, beforehand.
In Addition to Cockpit, we also want to make the machine available without using the IP address. This is pretty easy in a home network setup, and the technology for the same is mDNS. The Avahi daemon implements this technology and makes your server available in your local network via the hostname.
Automation (of course)
If you expect a couple of "copy and paste" commands, I have to disappoint you. We will do the setup in Ansible, of course. So, grab your playbook from the previous article or check out my Git repository and let's automate the setup. The playbook was looking something like the below snippet.
---
# ansible playbook for github.com/dschier-wtd/fedora-homeserver

- name: "Configure Fedora Homeserver"
  hosts: "all"

  vars_files:
    - "../manifest.yml"

  tasks:

    - name: "Configure hostname"
      ansible.builtin.hostname:
        name: "{{ system.hostname }}"
      become: true

    - name: "Configure timezone"
      community.general.timezone:
        name: "{{ system.timezone }}"
      become: true

    - name: "Manage chrony Packages"
      ansible.builtin.package:
        name: "chrony"
        state: "present"
      become: true

    - name: "Manage chrony Services"
      ansible.builtin.service:
        name: "chronyd.service"
        state: "started"
        enabled: true
      become: true

    - name: "Manage cli Packages"
      ansible.builtin.package:
        name:
          - "bash"
          - "bash-completion"
          - "tmux"
          - "wget"
          - "curl"
        state: "present"
      become: true

    - name: "Manage tuned Packages"
      ansible.builtin.package:
        name: "tuned"
        state: "present"
      become: true

    - name: "Manage tuned Service"
      ansible.builtin.service:
        name: "tuned.service"
        state: "started"
        enabled: true
      become: true
...If you forgot how to apply a playbook, just use the below command.
# Run the configure.yml playbook
$ ansible-playbook -u USER -k -K -i IPADDRESS, ansible/playbooks/configure.yml
So, let's continue from here.
Avahi
The first I want to do is setting up Avahi. Avahi is a software that facilitates mDNS to broadcast the own hostname to a local network. If another device supports mDNS (most will do), your server will be available via it's hostname in the network. Instead of typing the IP address in a browser or command line, you can use the fully qualified hostname, afterwards.
We only need to append a couple of tasks to the playbook and make Avahi working.
---
# ansible playbook for github.com/dschier-wtd/fedora-homeserver

- name: "Configure Fedora Homeserver"
  hosts: "all"

  vars_files:
    - "../manifest.yml"

  tasks:

    - name: "Configure hostname"
      ansible.builtin.hostname:
        name: "{{ system.hostname }}"
      become: true

...SNIP...

    - name: "Manage avahi Packages"
      ansible.builtin.package:
        name:
          - "avahi"
          - "nss-mdns"
        state: "present"
      become: true

    - name: "Manage avahi Services"
      ansible.builtin.service:
        name: "avahi-daemon.service"
        state: "started"
        enabled: true
      become: true

    - name: "Manage avahi Firewall Policy"
      ansible.posix.firewalld:
        service: "mdns"
        state: "enabled"
        permanent: true
        immediate: true
      become: true
...That's already it. This will install the needed packages, start and enable the system service and also configure the firewall. After a couple of seconds, you will be able to reach the machine with its hostname (default is home.local). Just try it:
# ping via IP address
$ ping YOUR.IP.ADDRESS.HERE

# ping via hostname
$ ping home

# ping via fully qualified domain name
$ ping home.local
Now, you don't need to remember IP address any longer and can focus on other nice things. If your router decides to switch the address, not a problem. Avahi will promote the new mDNS name to other network devices immediately.
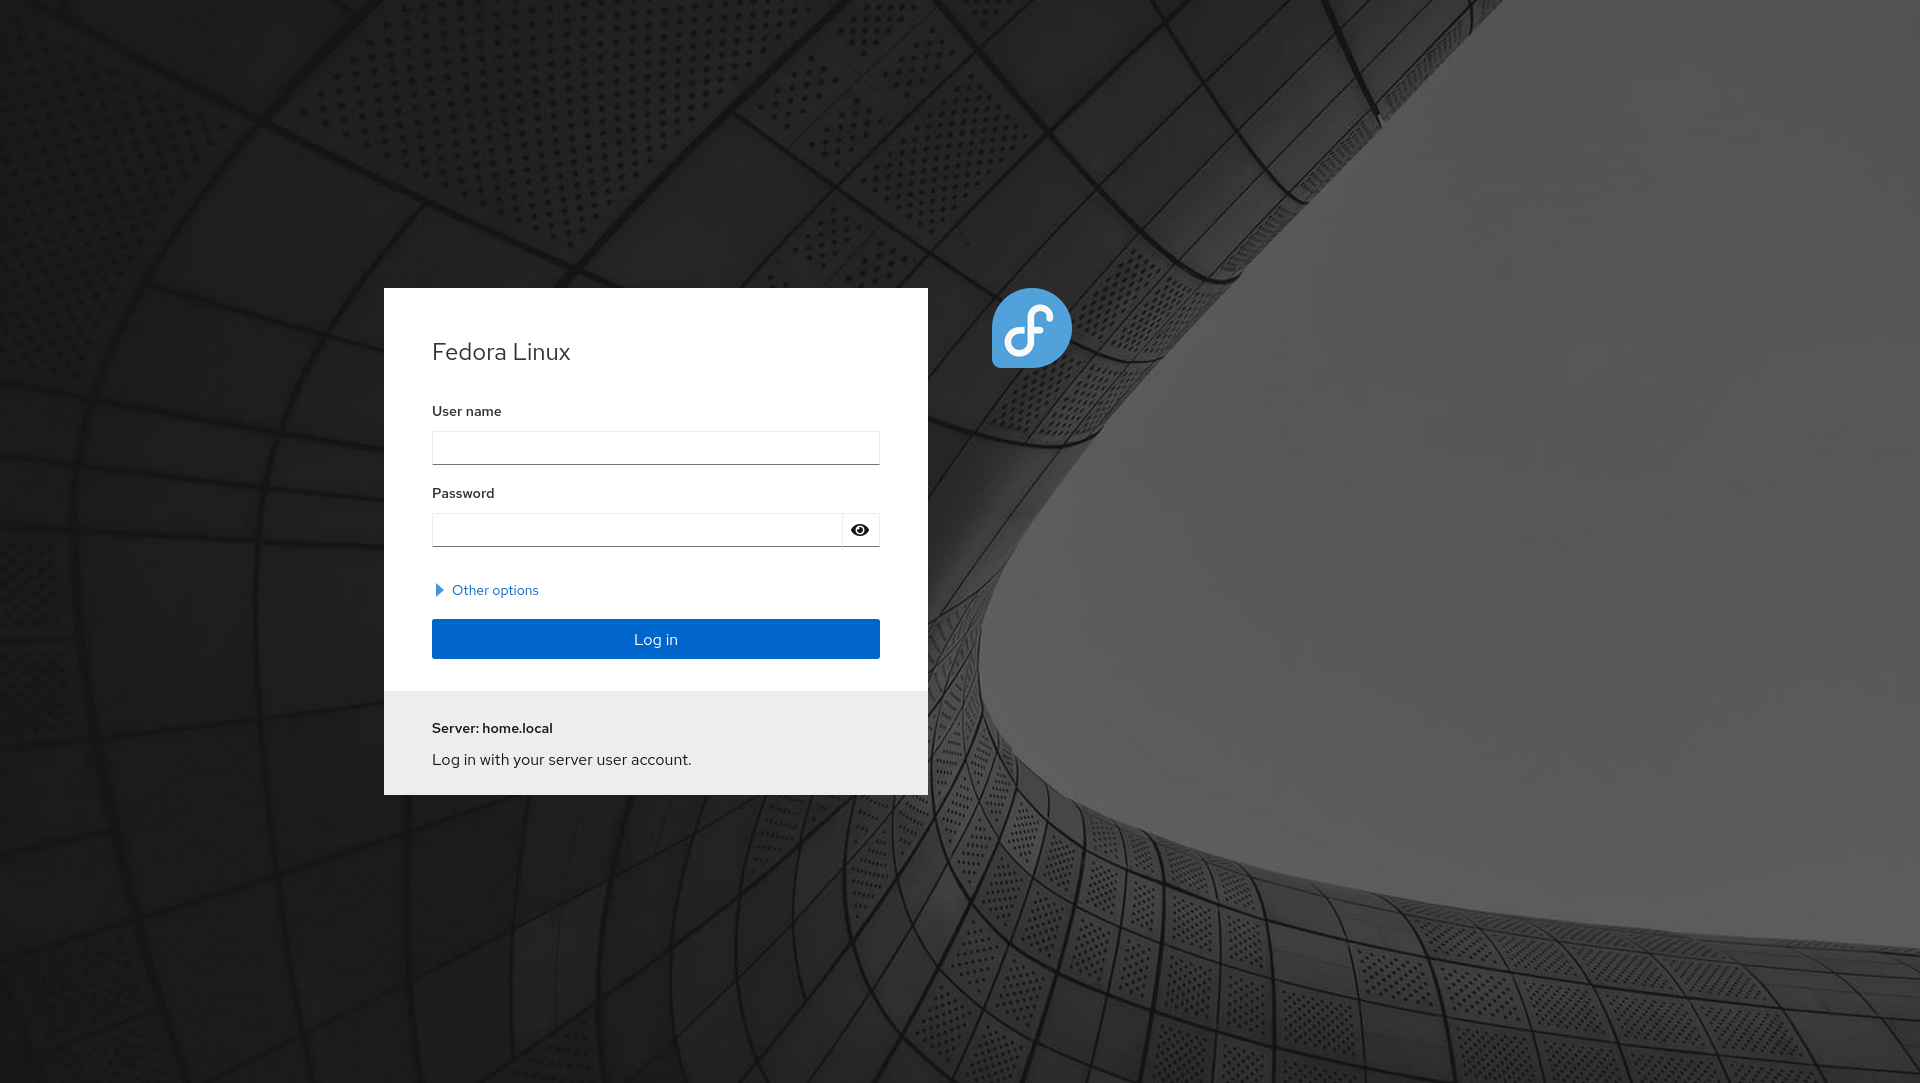
Cockpit
Now that the IP address is out of the way, we want to have a web interface to interact with the server. This is pretty easy to automate, too. We just need to edit the "configure.yml" and include the below snippet.
...SNIP...
    - name: "Manage cockpit Packages"
      ansible.builtin.package:
        name:
          - "cockpit"
          - "cockpit-selinux"
          - "cockpit-sosreport"
        state: "present"
      become: true

    - name: "Manage cockpit Services"
      ansible.builtin.service:
        name: "cockpit.socket"
        state: "started"
      become: true

    - name: "Manage cockpit Firewall Policy"
      ansible.posix.firewalld:
        service: "cockpit"
        state: "enabled"
        immediate: true
        permanent: true
      become: true
...This will install the basic packages and allow you to use Cockpit. Just open your browser and point to https://HOSTNAME:9090or https://IPADDRESS:9090 and log in with your credentials. In the example case, https://home:9090 should work.
At the first page, you will find various information about the hostname, timezone and power profiles. All of these were already configured in the previous article "Fedora - Home Server (Automation)".
In future implementations, we will add more possibilities to the cockpit web interface. At some point, you will be able to create VMs and start containers.
Performance Co-Pilot
If you played around with Cockpit from the last section, you may have already found that performance data is not persisted. Sure, you can install the needed tooling via the Cockpit itself, but automating this process has many benefits.
To gather and store performance data, Cockpit uses Performance Co-Pilot. This is a very powerful metrics collection system. For our use case, the most basic implementation is sufficient. So, let's automate the setup. Shall we?
Just open the playbook "configure.yml" again and append the below part.
...SNIP...
    - name: "Manage pcp Packages"
      ansible.builtin.package:
        name:
          - "pcp"
          - "cockpit-pcp"
        state: "present"
      become: true

    - name: "Manage pcp Services"
      ansible.builtin.service:
        name: "{{ item }}"
        state: "started"
      become: true
      loop:
        - "pmcd.service"
        - "pmlogger.service"
...Afterwards, you can check the Cockpit interface at any given time, and you will have access to historical performance data. There are also options to connect a Grafana instance to PCP, but this will be part of a future article.
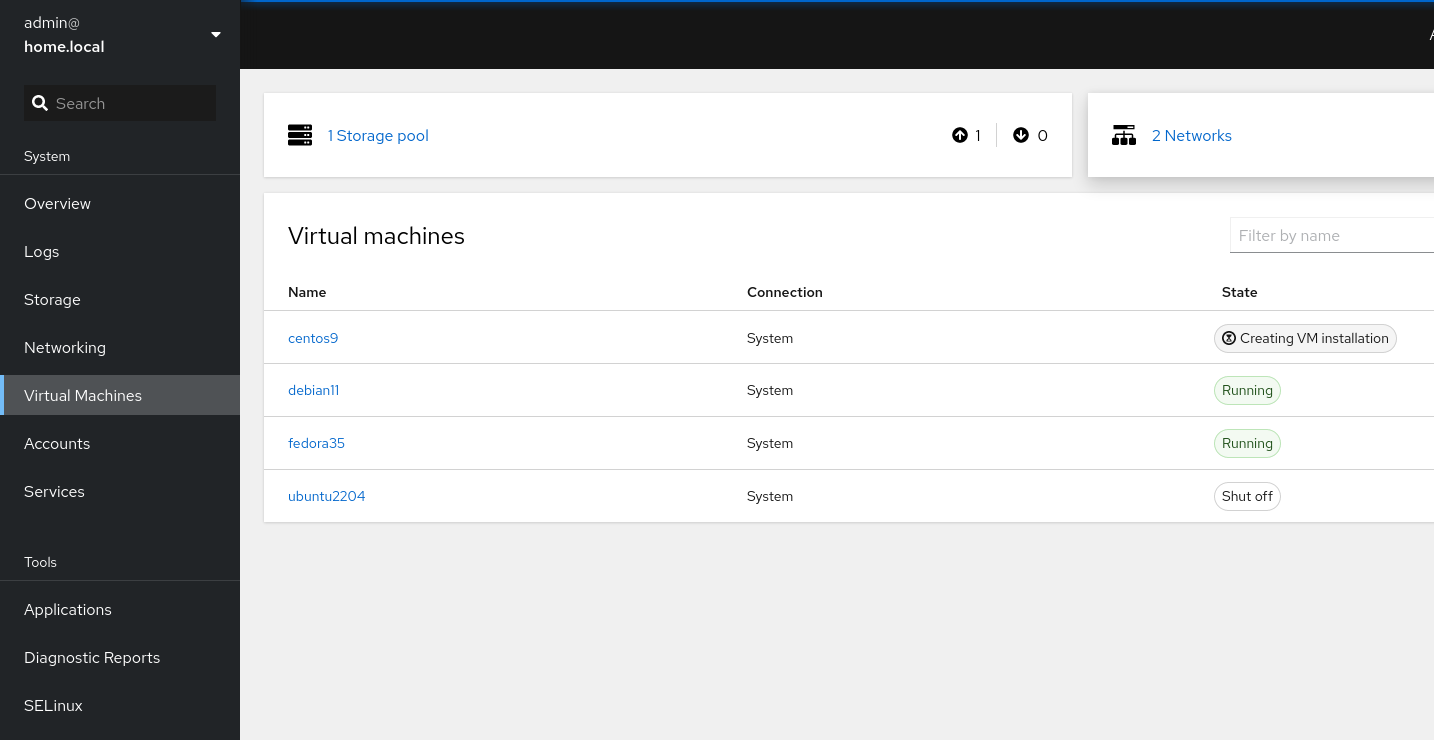
Managing your home server
Installation is done, but what next? Pretty easy, check out the Cockpit web interface and the options you are having there. The below screenshot collection will give an idea.

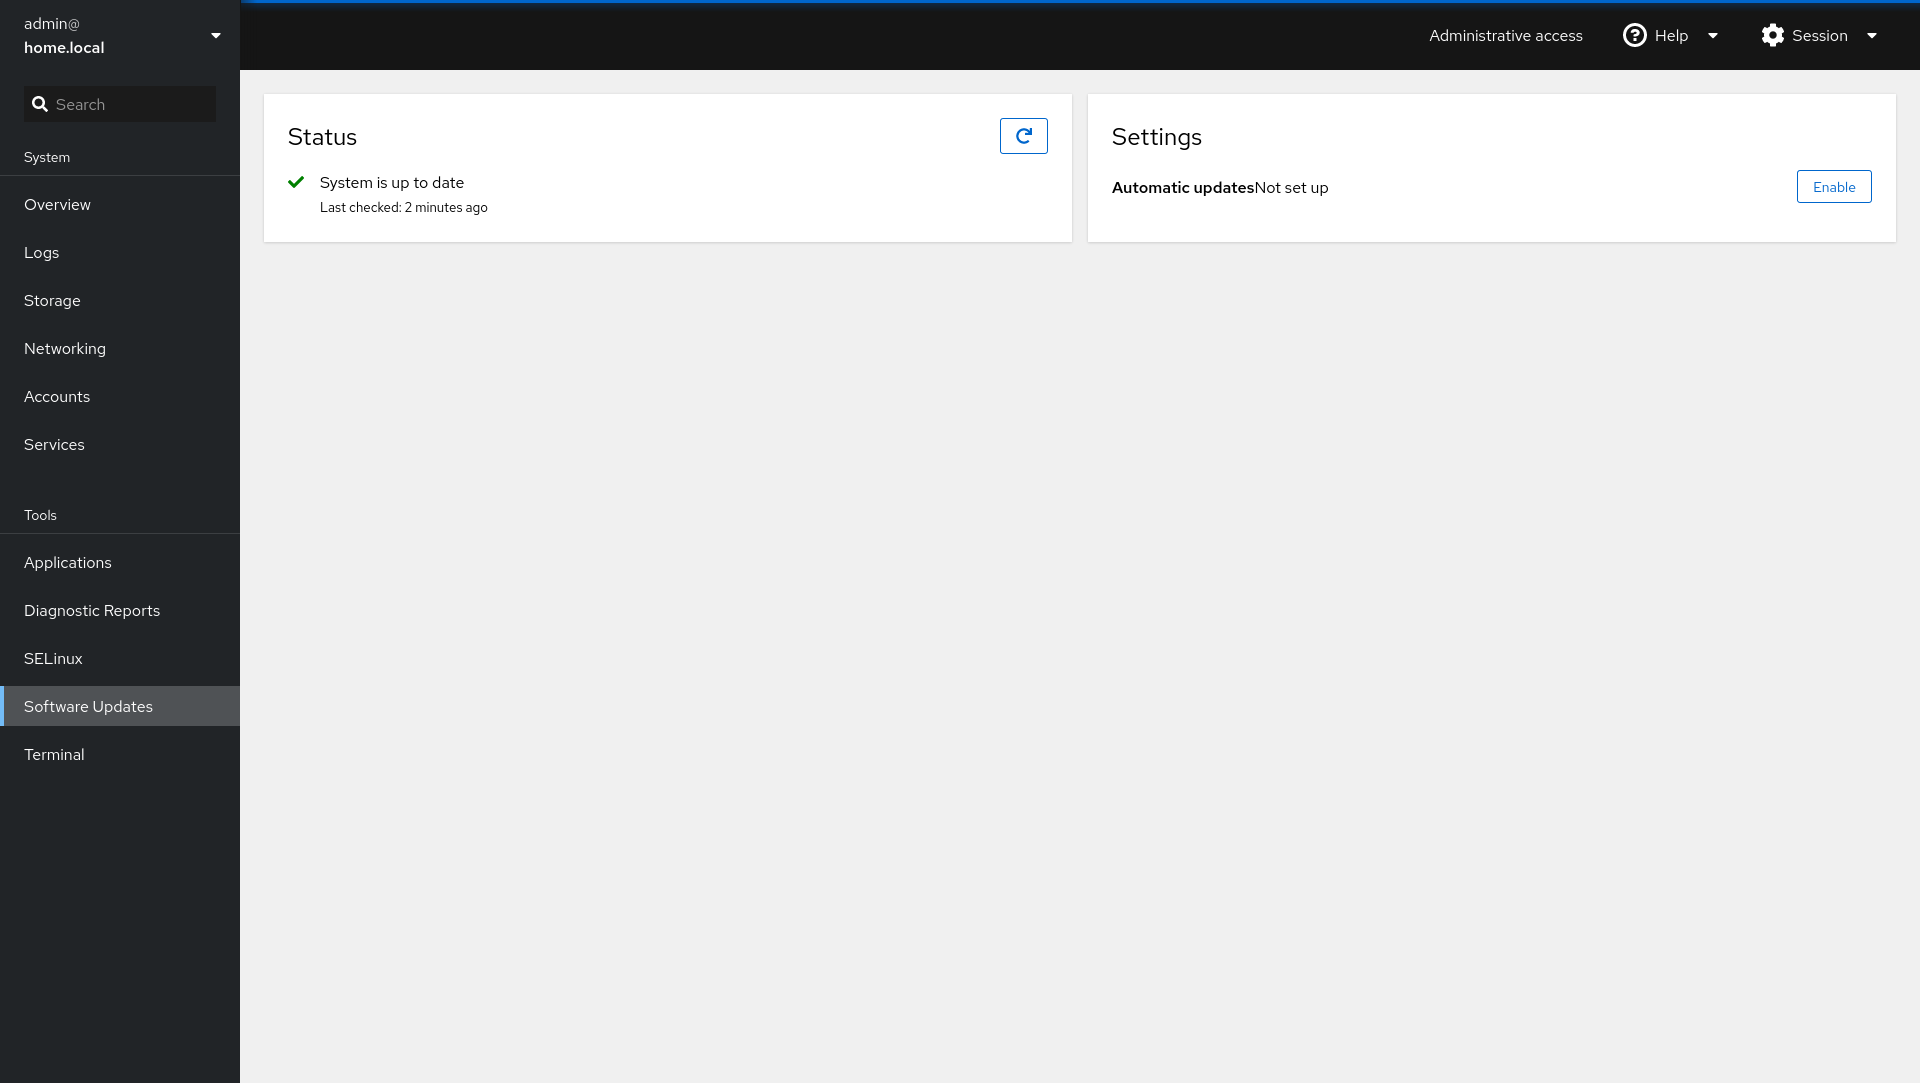
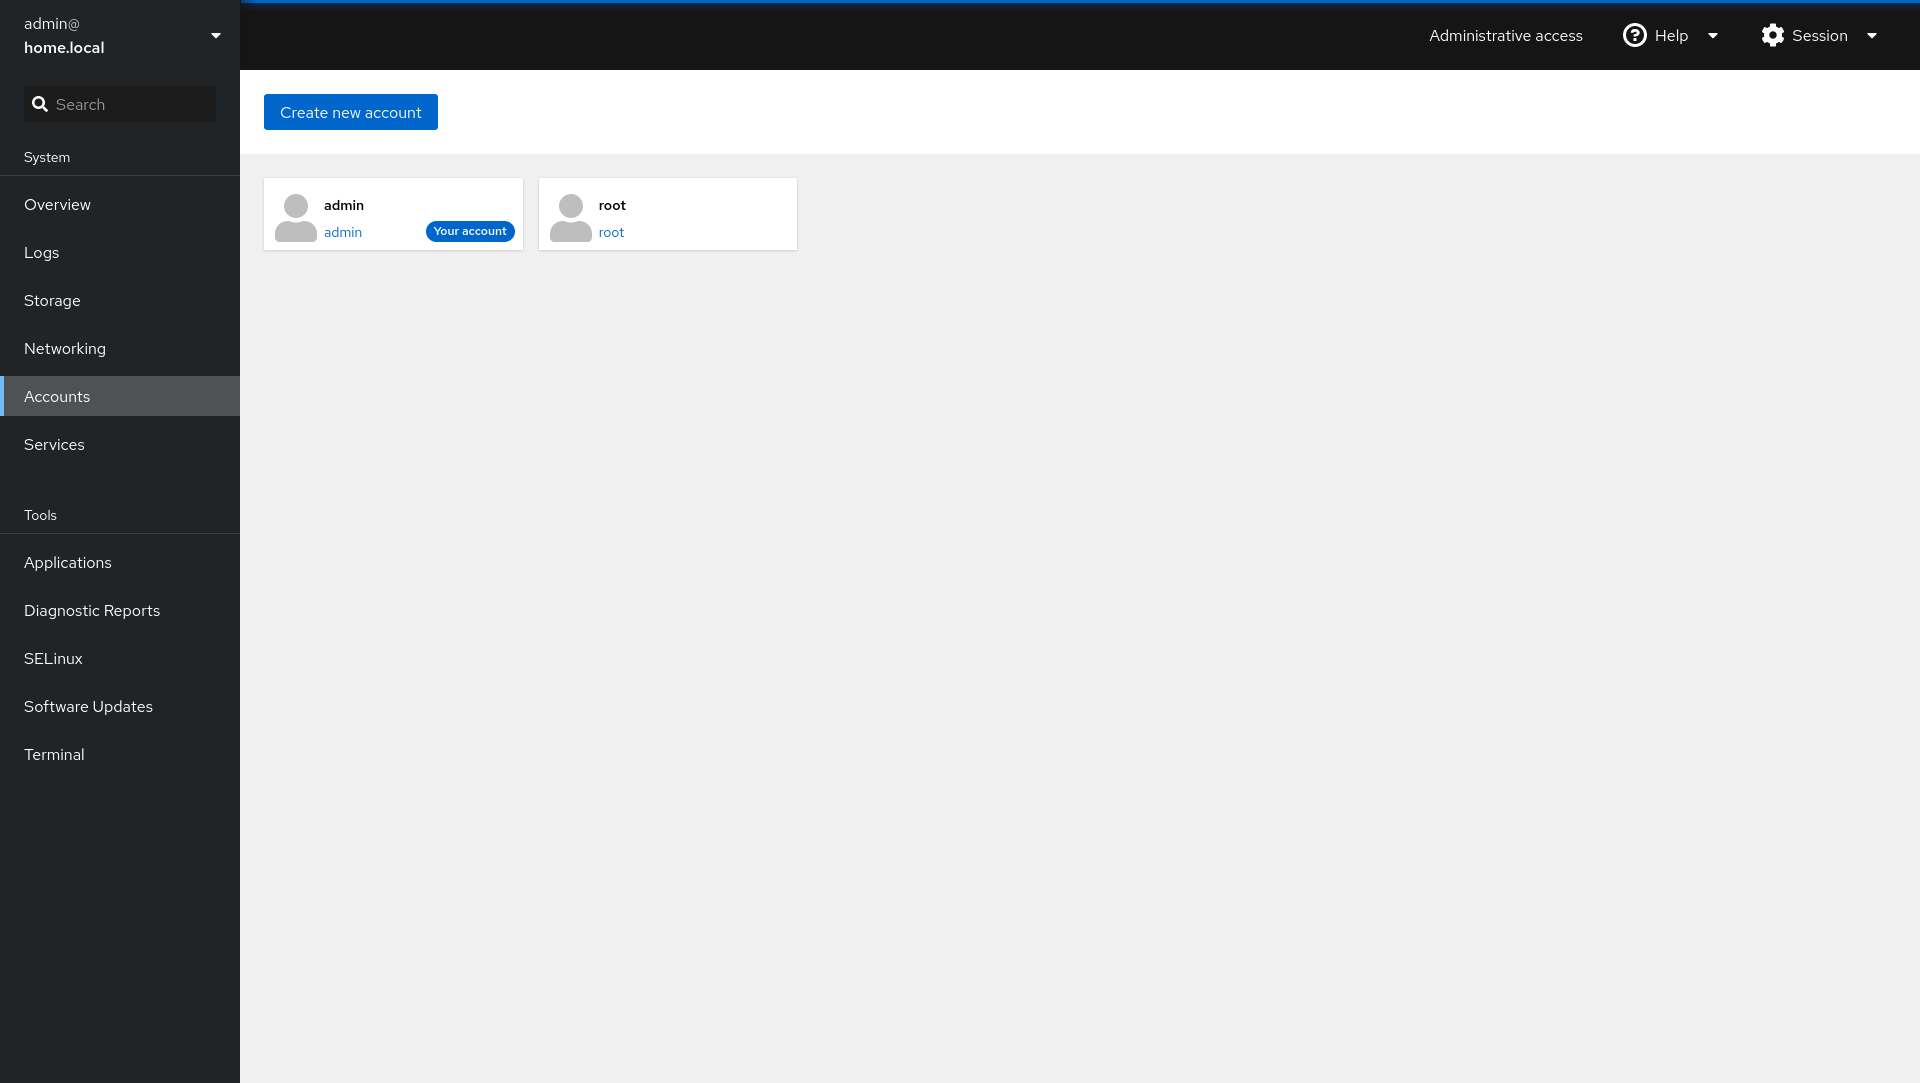
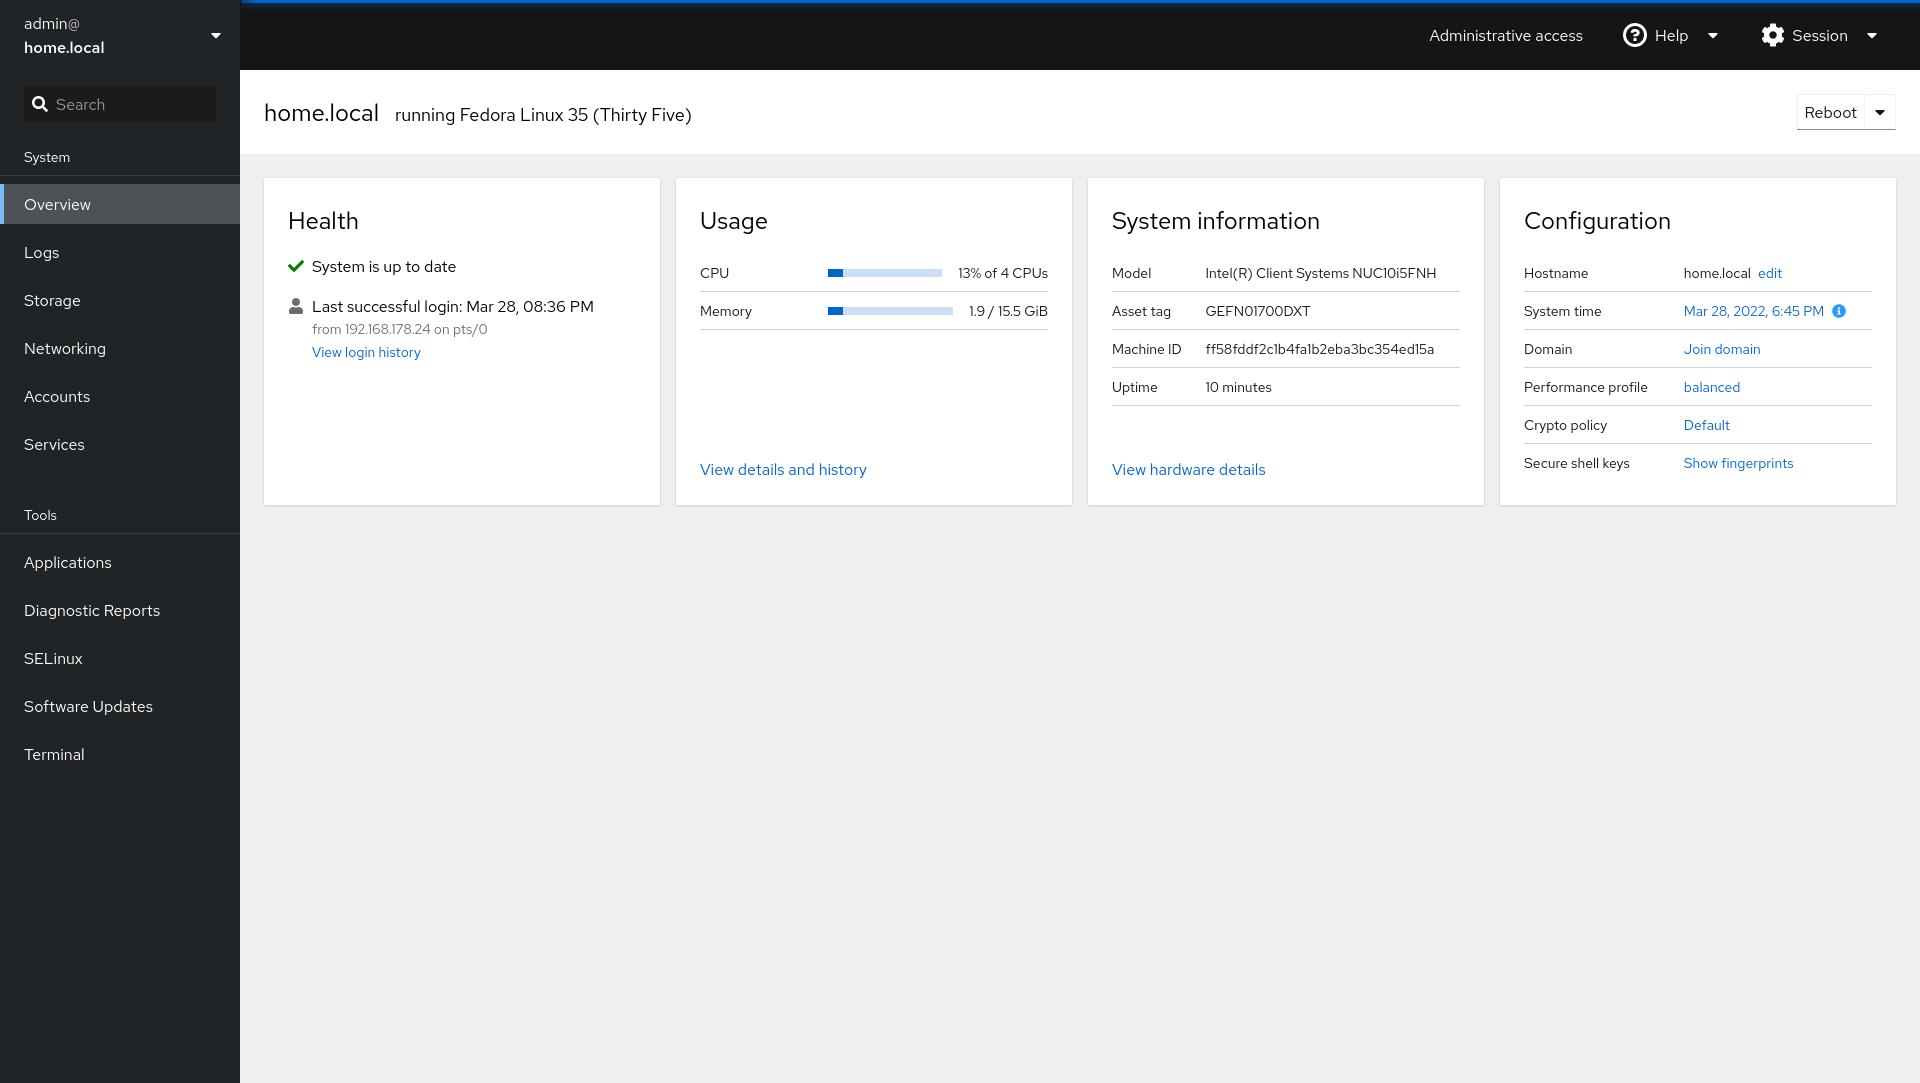
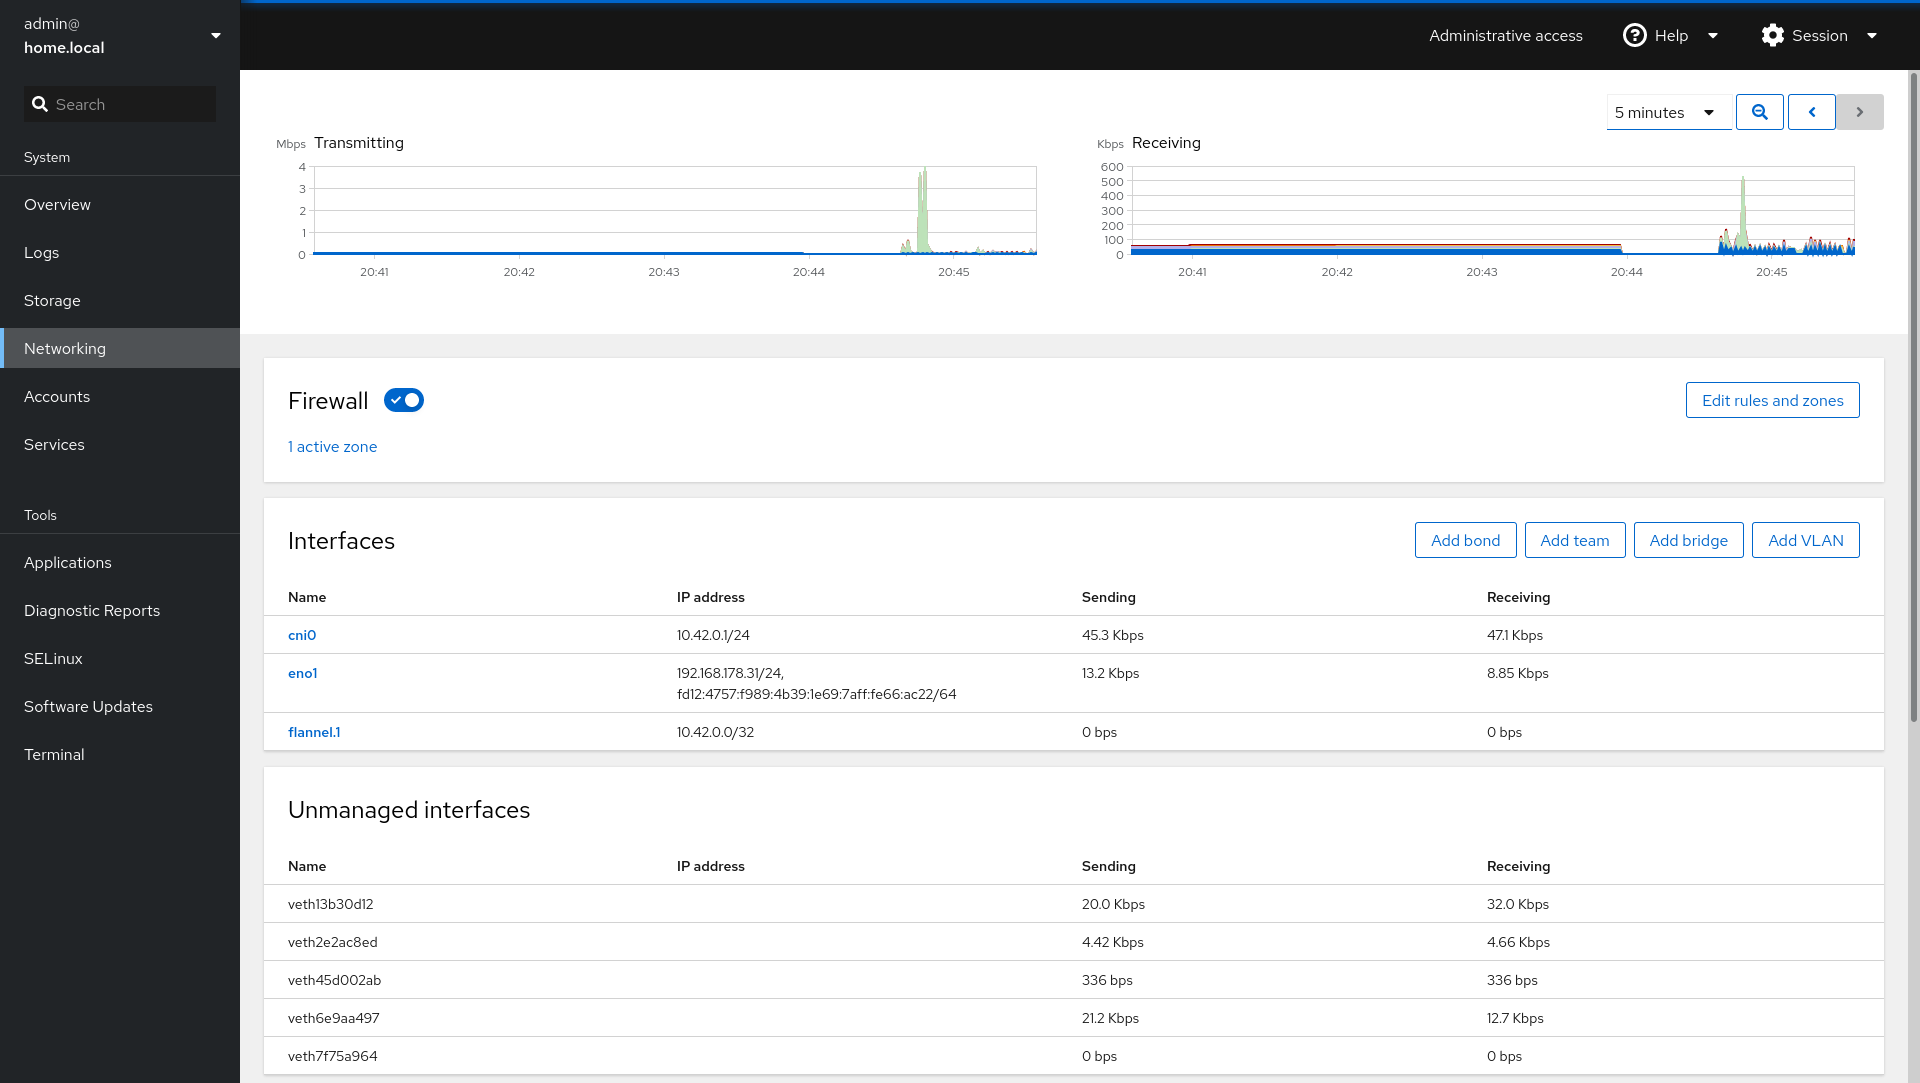
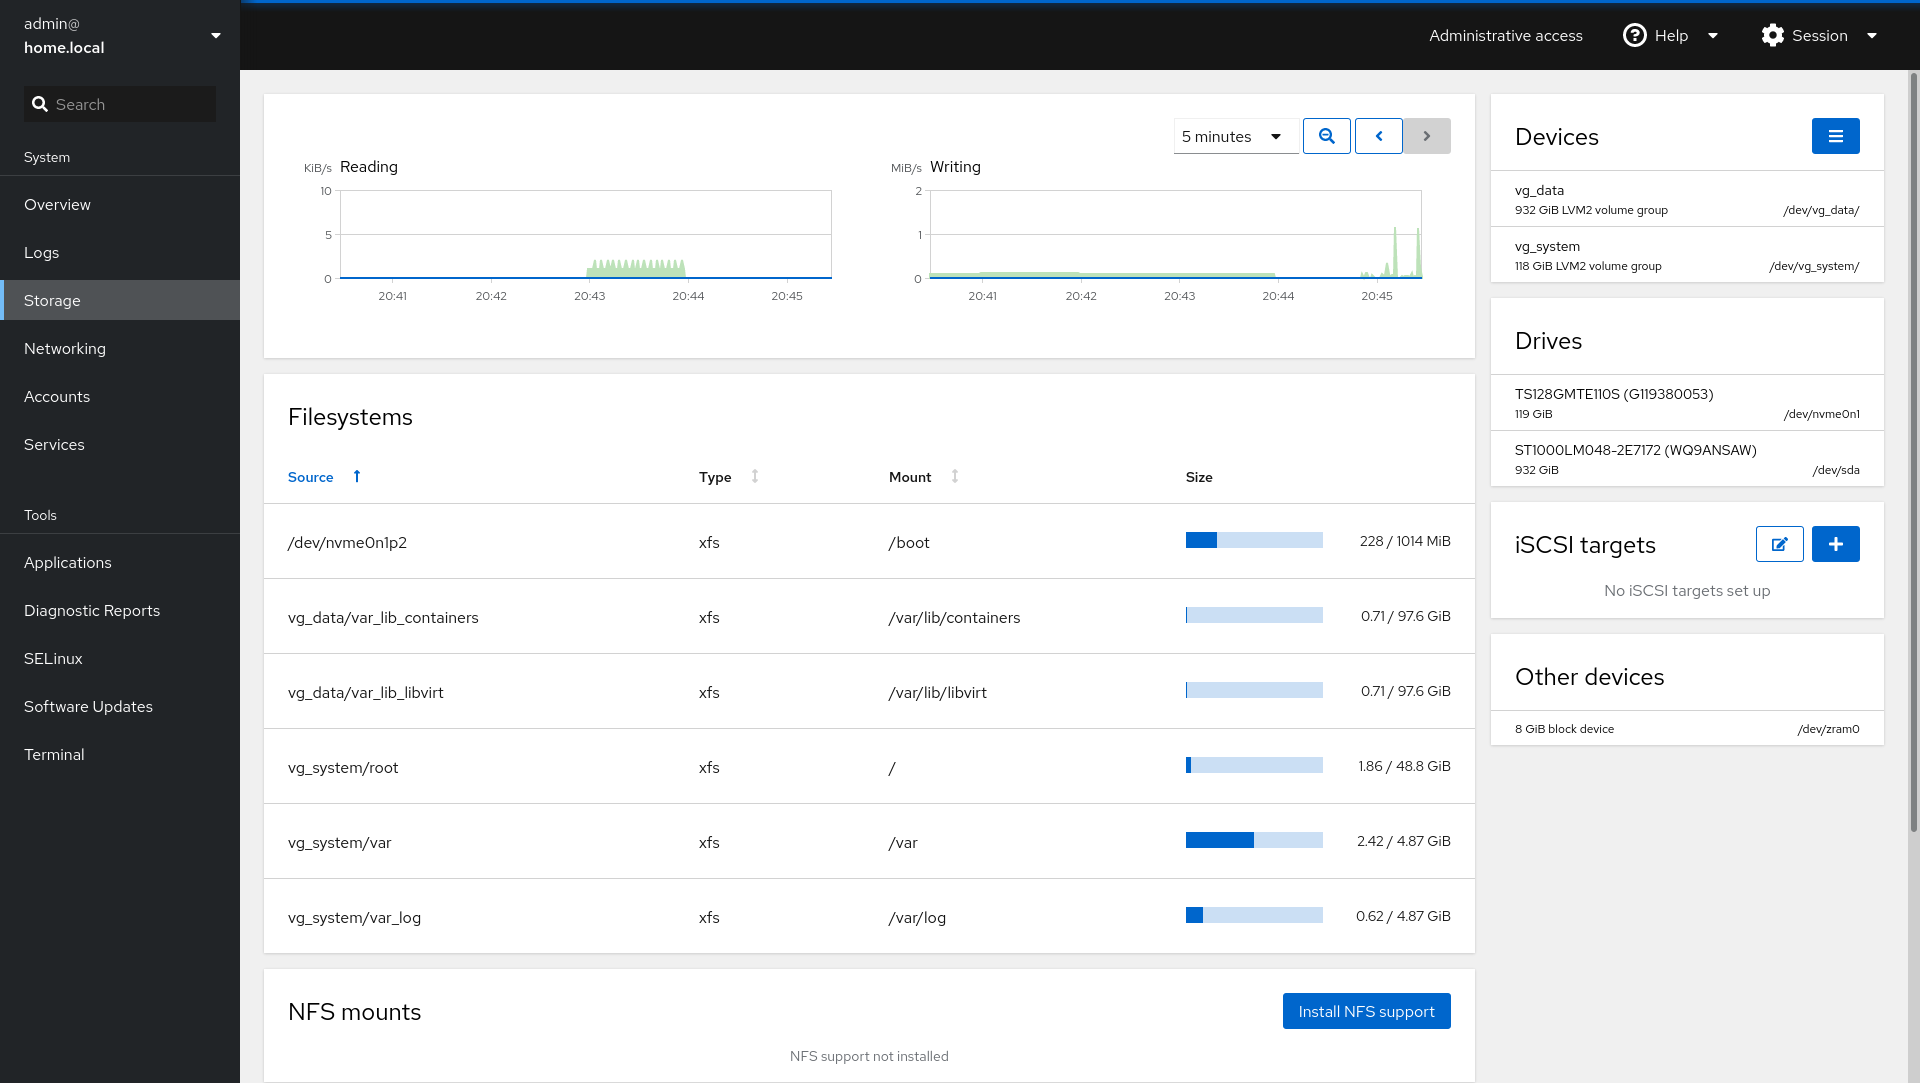
Have fun playing around and checking out your new home server. We are pretty close to a "Synology" experience, aren't we?
Docs & Links


 Paul W. Frields
 Shaun Assam
Conclusion
So, that's already the management part. You can find the complete code in the updated "Fedora-Homeserver repository", including some guidance to apply the complete playbook. By the way, Cockpit is also available for many other GNU/Linux distributions, including CentOS and Alma Linux.
Have you heard of Cockpit beforehand? Have you automated the setup? Do you know any cool alternatives?
Continue
Please check out the next article of this series.